Wise
Wise is a local-first and AI-native modern reader that helps you collect, read, and manage information from various platforms. It allows you to run self-hosted recommendation algorithms to filter and sort online content, thus breaking the information bubble. Together with the TermiPass browser plugin, you can save valuable articles to Terminus with a single click, making it easy to build a personal knowledge base.
Learn more about how the recommendation algorithm works.
Create Your Recommendation Engine
To quickly create your digital backyard on Terminus, you need to install a recommendation algorithm from the Terminus Market.
Install a Recommendation Algorithm
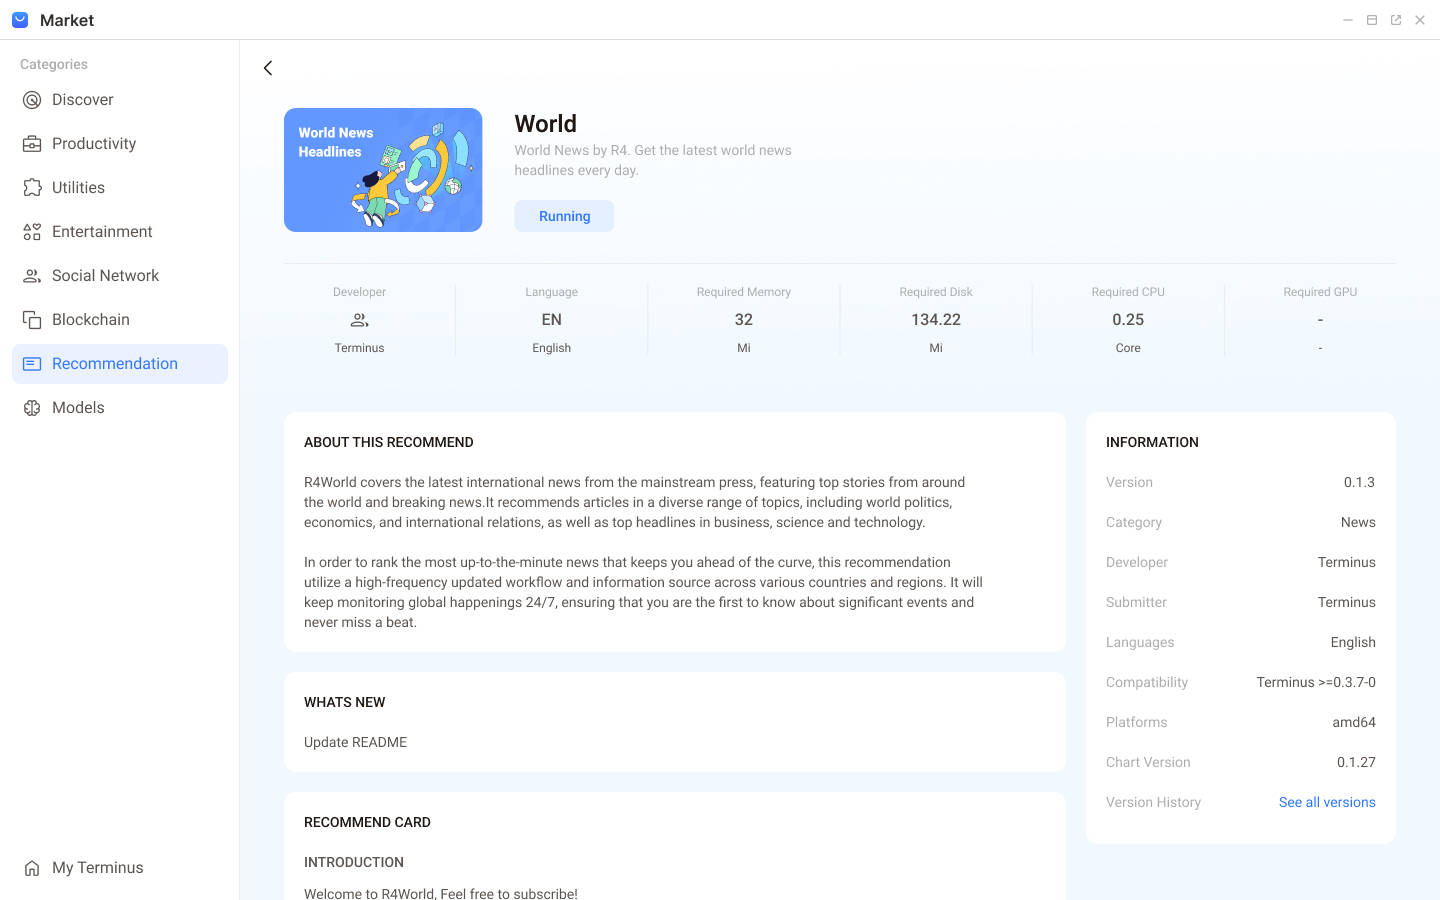
To install a recommendation algorithm:
- Choose your preferred recommendation algorithm from the Recommendation category in the Market.
- Click the Get button to install the algorithm.
- Wait a while for the algorithm to complete the recommendation workflow locally. Then you should be able to see the content recommended by the algorithm in Wise.
View the Content
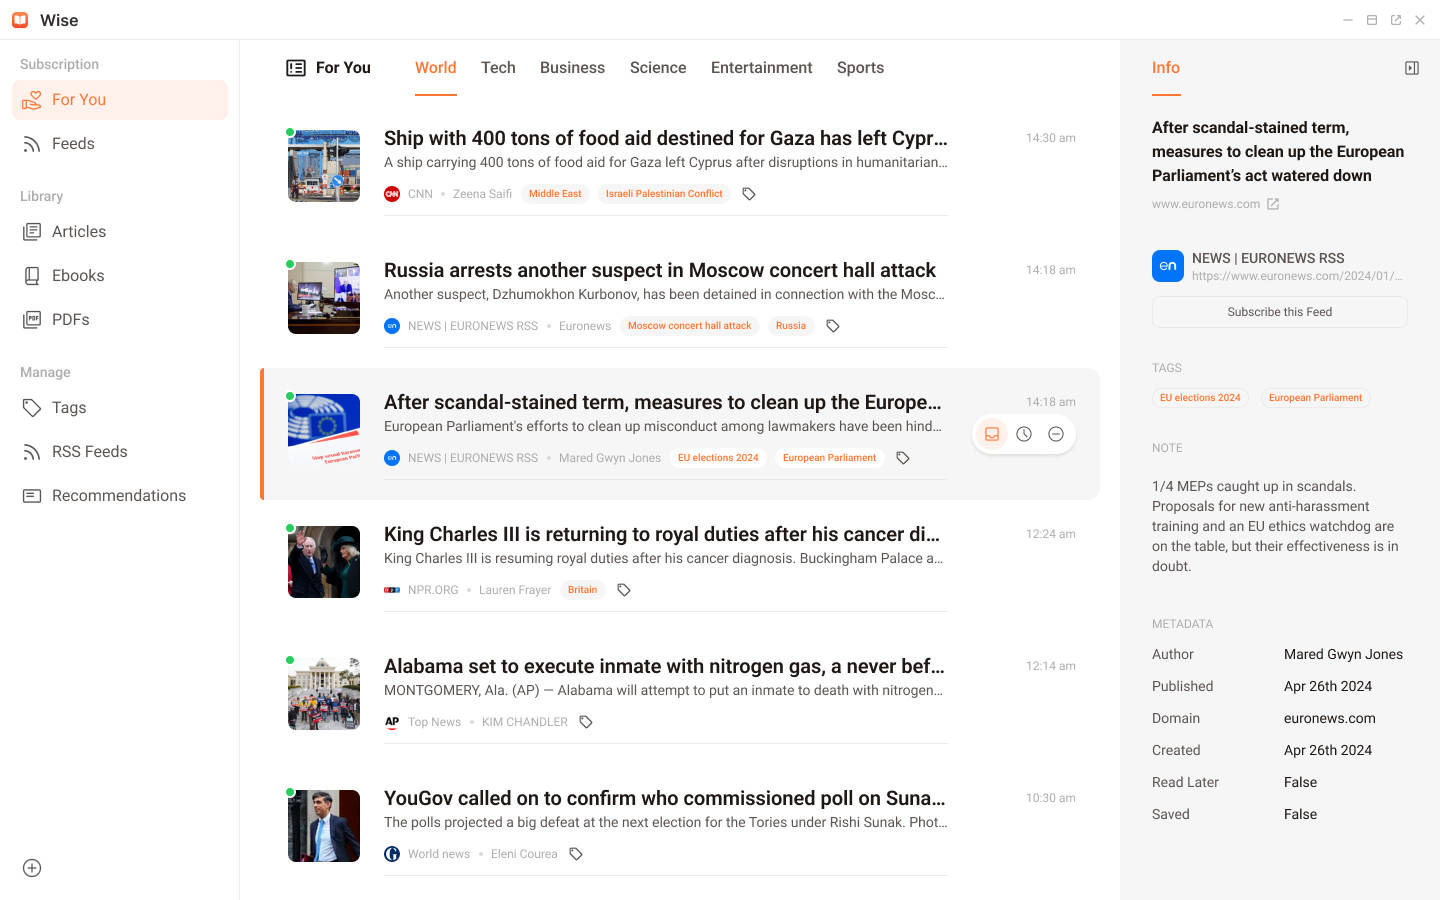
To view the recommended content, simply navigate to the For You page in Wise. This page shows the results of all installed recommendation algorithms, each with its own content feed. You can switch between algorithms by clicking the recommendation title at the top.
Result List
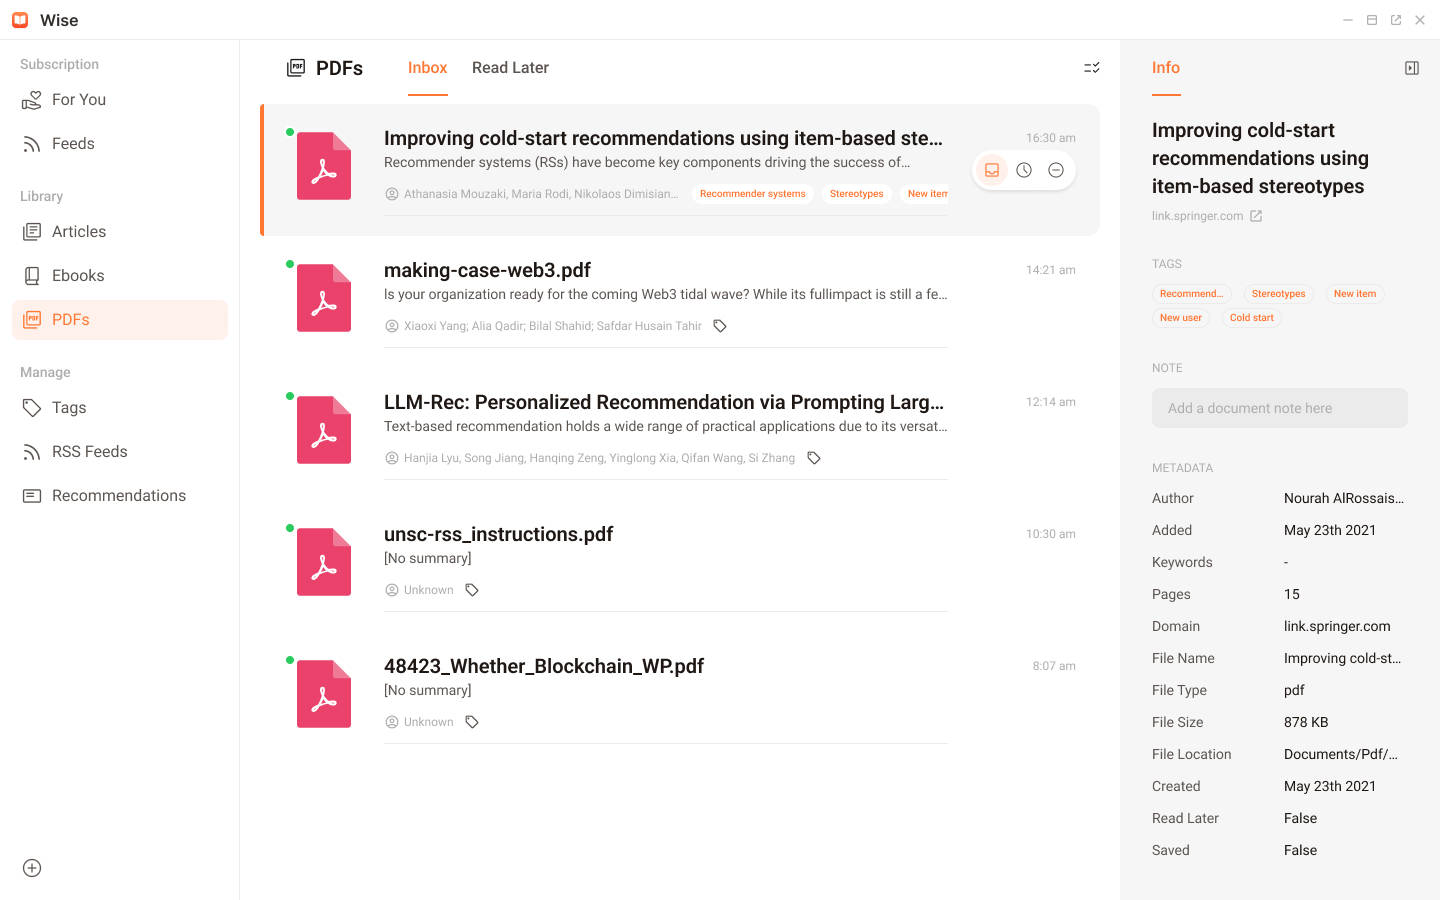
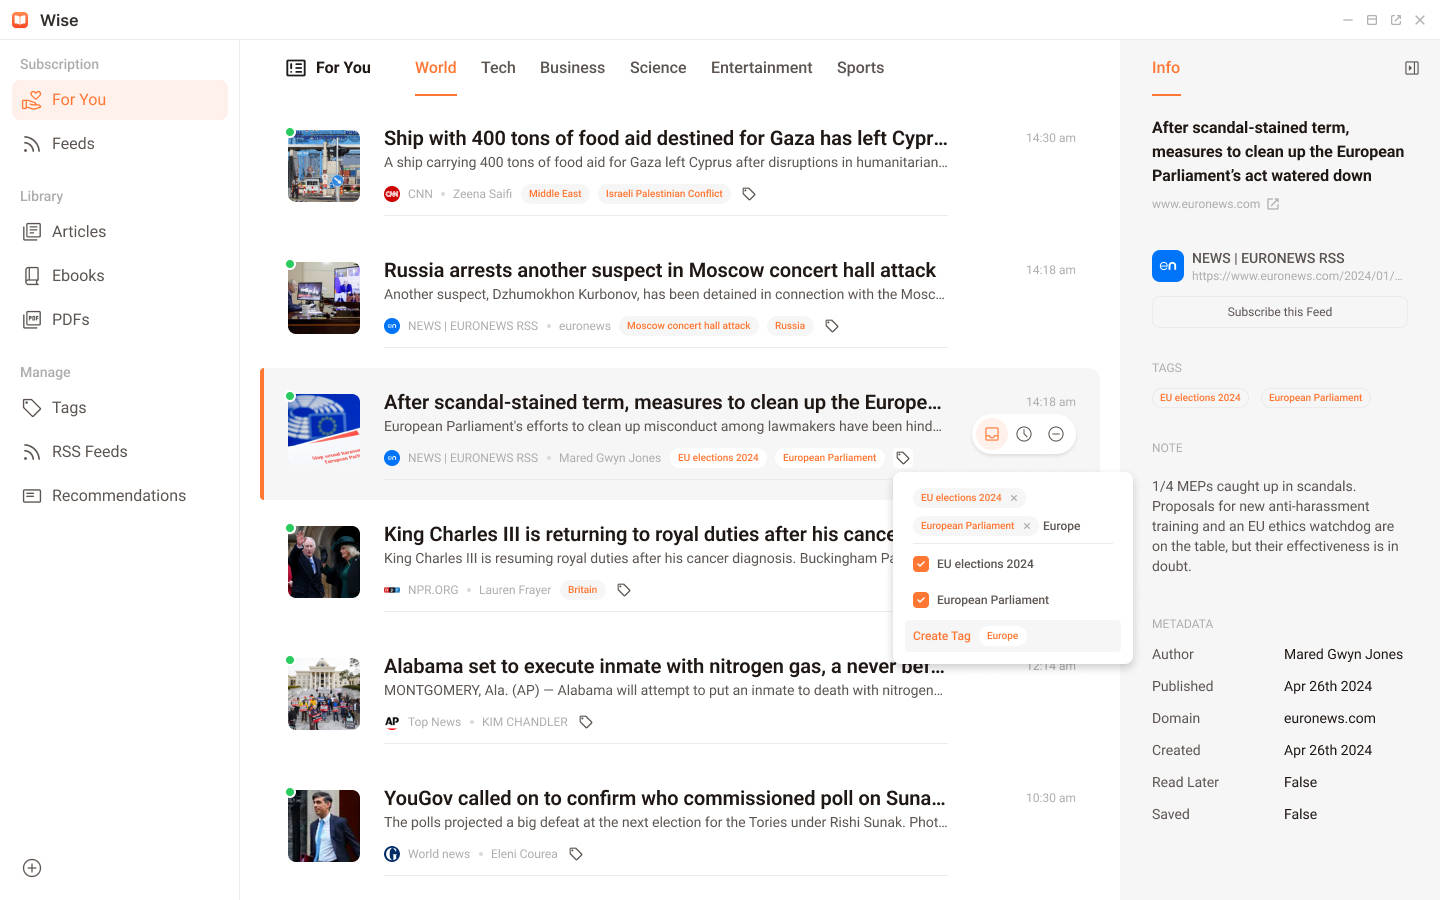
The recommended results appear in a list. Each row displays the article's cover, title, summary, source, author, publication time, and tags. Articles you haven't seen are marked with a green dot in the upper left corner of the cover image. Click the article title to read it.
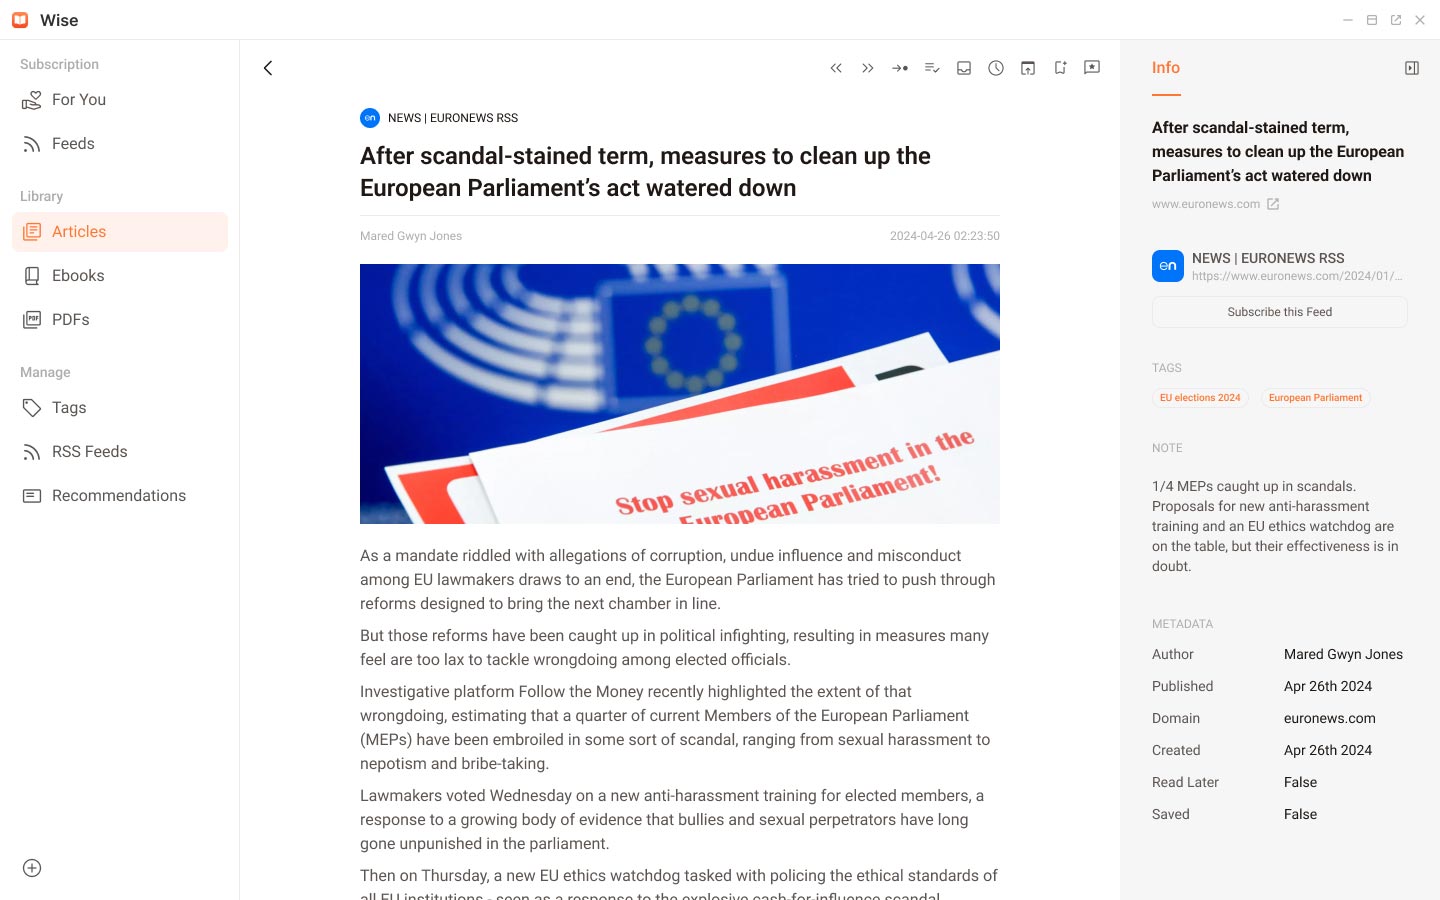
Info Pane
Use the button in the upper right corner to hide or show the Info pane. Located to the right of the article list, the Info pane displays detailed information about the selected article. Click the Subscribe this Feed button to add the source of this article to your Feeds page.
Quick Action Buttons
Hovering your mouse over an article title reveals quick action buttons on the right side. These buttons allow you to:
- Add to Inbox: Move the article to your Inbox for immediate reading.
- Add to ReadLater: Save the article for later consumption.
- Remove: Remove the article from the list.
Monitor Recommendation Workflows
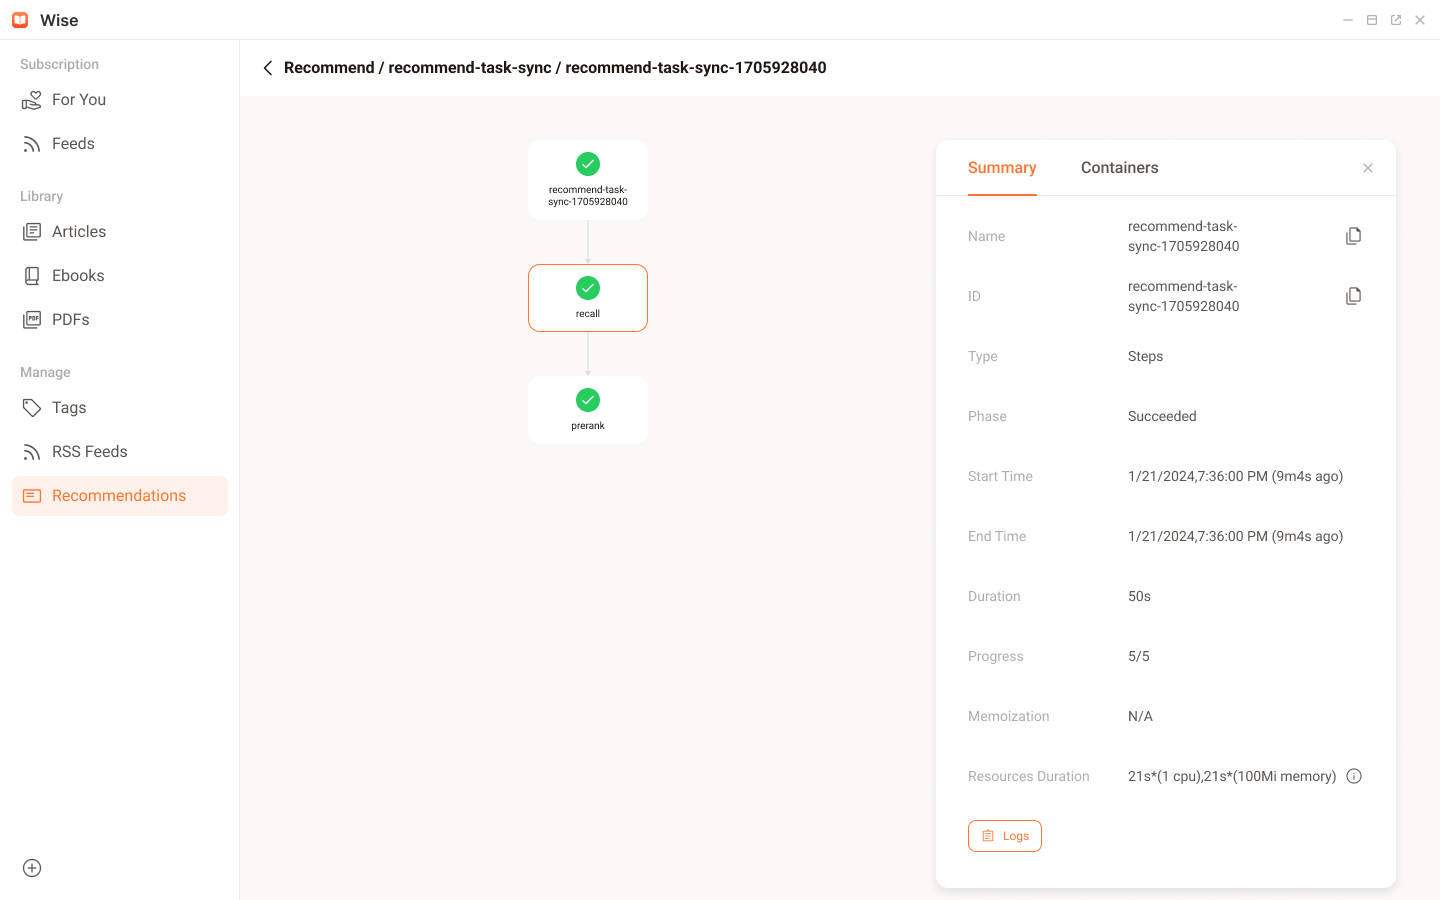
Keep track of all workflows in your recommendation engine through the Recommendations page:
- In the sidebar menu on the left, navigate to Manage > Recommendations.
- Click on a specific workflow to see its detailed operation records.
- Click on a record to access further details and logs.
In the example below, the visual representation of the workflow provides a clear overview of your recommendation process. By clicking on a node in the process chart, you can view the summary and container settings of each step. To examine the operation log of a node, click the Logs button. From here, you can view, download, or share the log.
Manage the Feeds
The Feeds feature in Wise empowers you to curate a personalized reading list and stay updated on content from your favorite sources.
Think of it as your personal news aggregator, similar to popular RSS readers. By subscribing to Feeds, you ensure that you never miss an update from websites, blogs, or other online platforms that matter to you.
Subscribe to Feeds
Wise offers multiple ways to subscribe to feeds, making it simple to curate your personalized reading list:
Subscribe from 'For You'. Wise's recommendation algorithm suggests valuable content in the "For You" section. To subscribe to the content source for an article under 'For You', do either of the following:
- Click the Subscribe this Feed button on the Info column.
- Click the Subscribe button on toolbar on the reading page.
Add an RSS Link Manually. You can manually add feeds using RSS links. Here are two ways to do so:
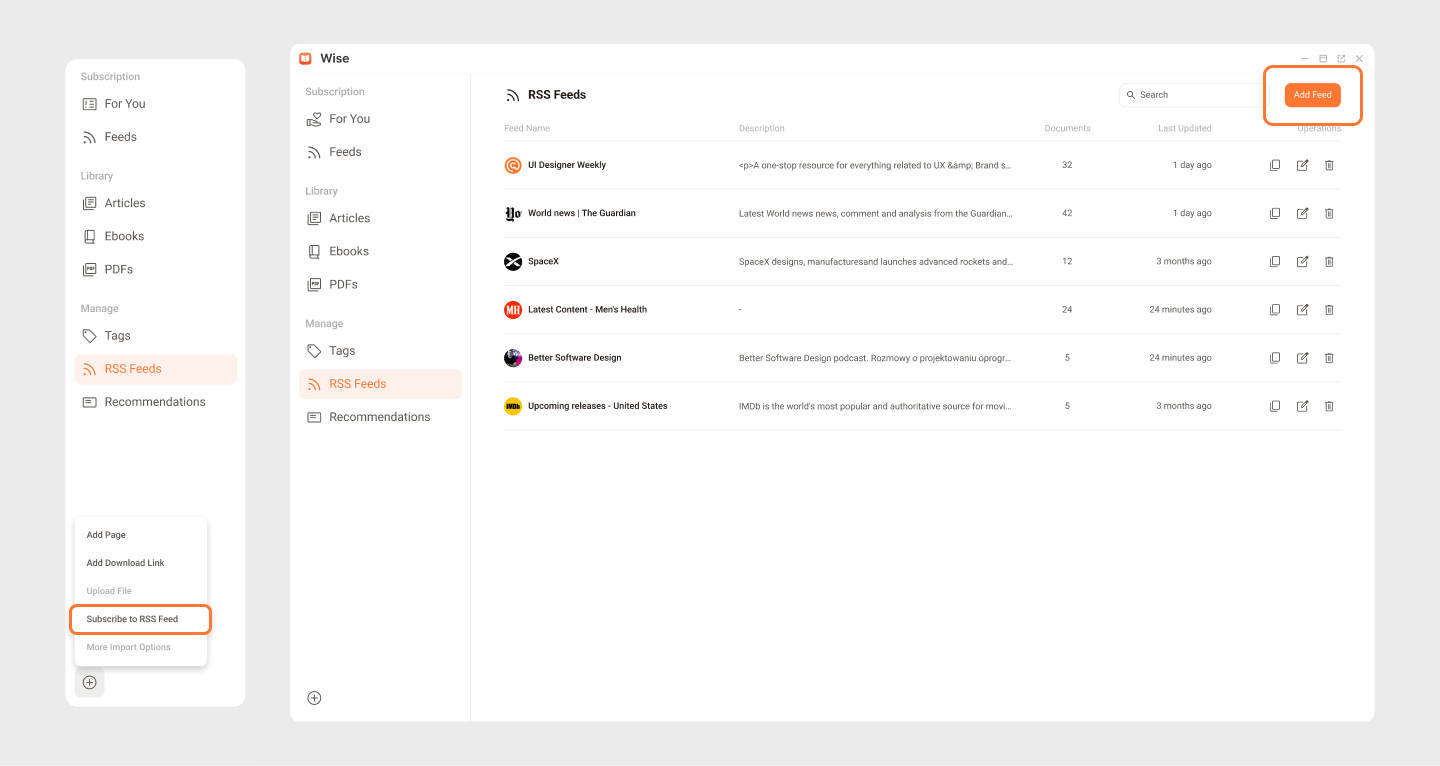
On the menu sidebar, click the Add button, select Subscribe to RSS Feed in the drop-down menu, and enter the RSS link in the pop-up dialog.
On the Manage Feed page, click the Add Feed button in the upper right corner, and enter the RSS link in the pop-up dialog.
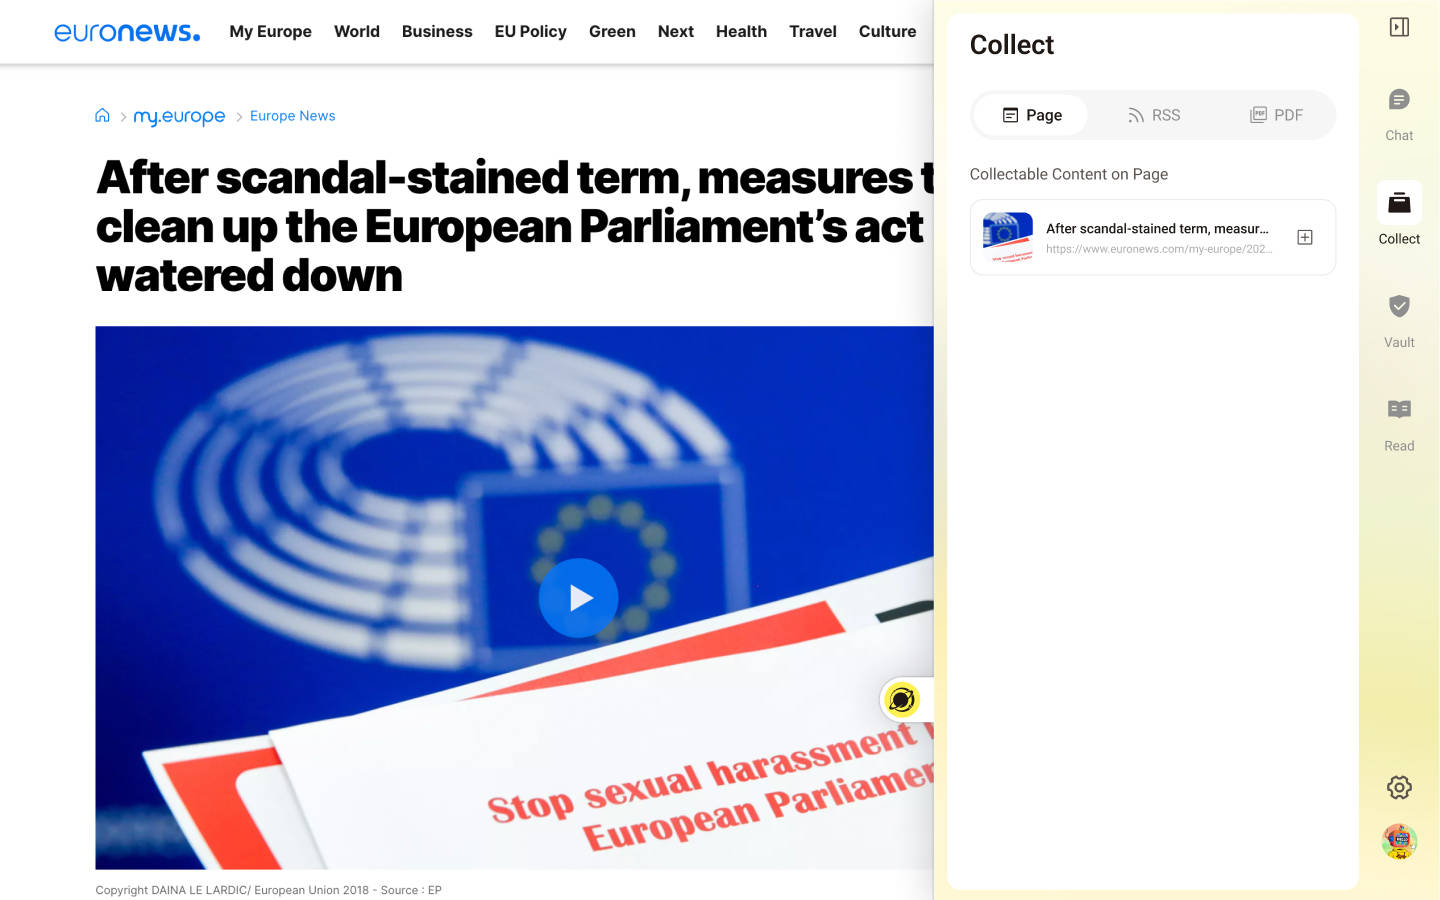
Use the TermiPass Browser Extension. If you're on a webpage that offers RSS subscriptions or has a corresponding RSS Hub route, you can use the TermiPass Browser Extension to simplify the subscription process.

- In your TermiPass Browser Extension, click Collect,
- Select the feed link you want to subscribe under the RSS tab.
- Click Subscribe to add it to Wise.
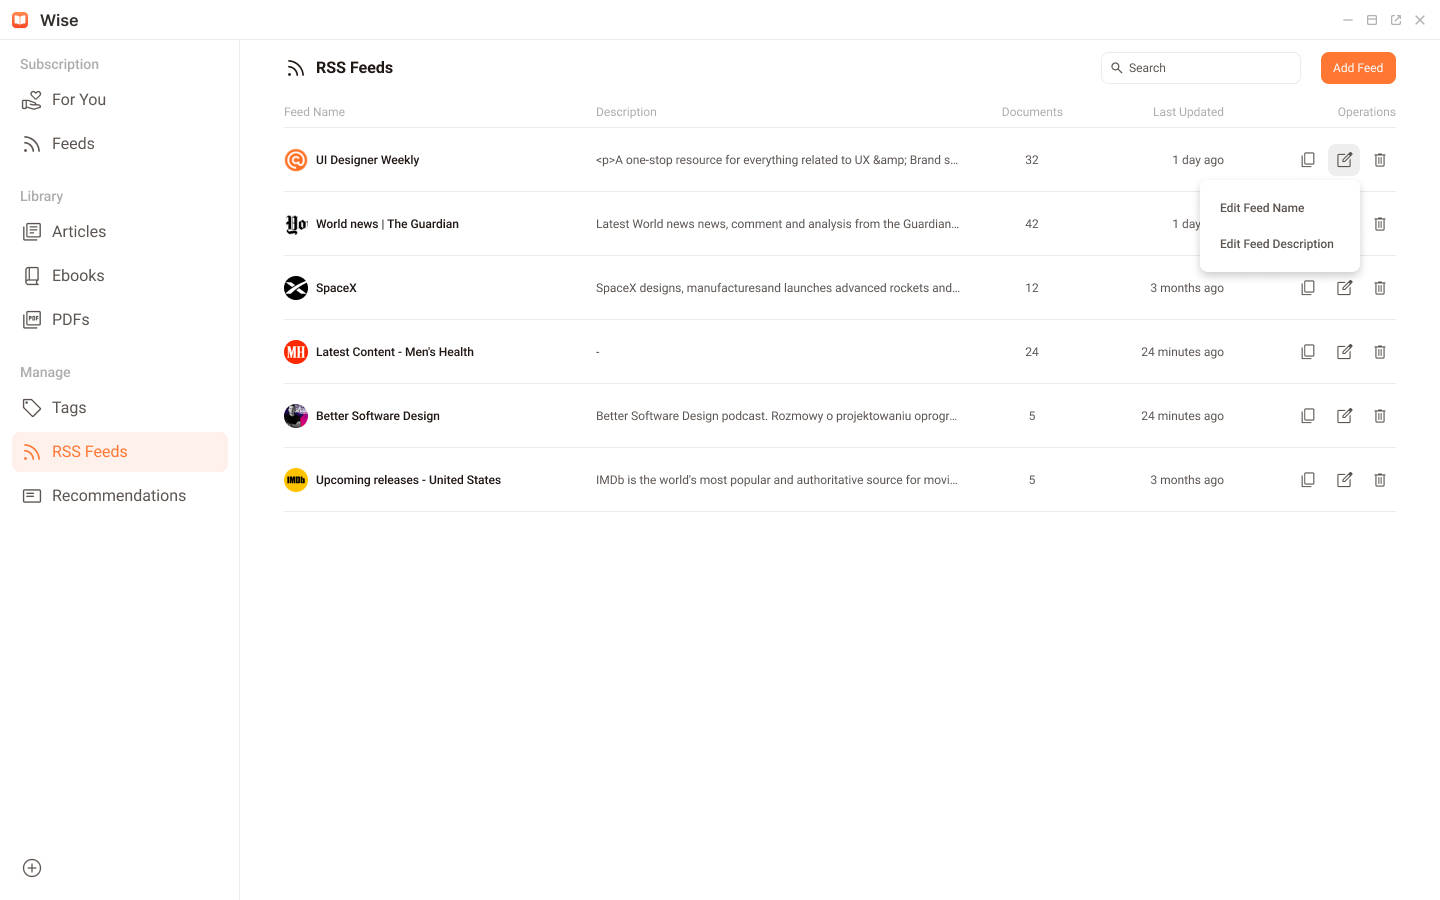
Manage RSS Feeds
The RSS Feeds page serves as a central hub for managing all your subscriptions. Here, you can:
View Feed Details: Get an overview of all your subscribed feeds, including their names, descriptions, and the number of unread articles. Search for Feeds: Use the search bar at the top to quickly locate specific feeds within your list. Perform Quick Actions: Managing RSS Feeds with the regular operation buttons including Copy Feed RSS Link, 'Edit Feed Name or Description', and Unsubscribe Feed.
Unsubscribe Feeds
You can unsubscribe a feed in the following ways:
- From the Manage Feed page: Navigate to the RSS Feeds page, find the Feed you want to unsubscribe from, and click the Unsubscribe Feed button on the right of the list.
- From the Info column: Select any article from the Feed you want to unsubscribe from, and click the Unsubscribe button.
- From the reading page: While reading an article from the feed you want to unsubscribe from, click the Unsubscribe button in the toolbar located above the article content.
WARNING
Unsubscribing from an RSS Feed deletes all articles under the Feed that have not been added to the Library. This operation cannot be undone.
Reading in Wise
To streamline your reading workflow, Wise offers two locations in Library to store your documents:
Inbox: Acts as the central repository for all newly added articles. Think of it as your "to-read" list.
ReadLater: Provides a dedicated space for articles you want to save for later consumption.
In addition to different locations, you can also filter your content based on the Seen/Unseen status of a document. Click the toggle button in the upper right corner of the result list to mark all documents on the current list as seen or unseen.
Articles
You can add articles on website to the Library using one of the following methods:
- Add from Subscription: While browsing the For You or Feeds list page, click the Inbox or ReadLater button to collect the article.
- Add from Reading Page: While reading an article, click the Inbox or ReadLater button in the Toolbar to collect the article.
- Add from Menu: Click the + button at the bottom of the menu sidebar, select Add URL in the popup options, and enter the webpage URL in the input box.
- Add from TermiPass Browser Extension: Open the TermiPass Browser Extension on the webpage you want to bookmark. Click Collect, then click the Add button under the Page Tab. This will add the current page to Wise's Inbox.
Reading an Article
You can click on any document card to enter the reading page. The Toolbar at the top of the page contains frequently used features, while the Info pane on the right side displays basic article information.
Here's a brief introduction to the Toolbar functions:
- Previous: Jumps to the previous article in the result list
- Next: Jumps to the next article in the result list
- Next Unread: Jumps to the next unread article in the result list
- Mark as Read/Unread: Changes the read status of the article
- Inbox: Adds the article to the Inbox
- Read Later: Adds the article to the ReadLater box.
- Open Origin: Opens the original URL of the article in a new window
- Subscribe/Unsubscribe Feed: Subscribe to or unsubscribe from the RSS Feed of a specified article in the 'For You' and 'Feeds' lists.
PDFs
There are 2 ways to add PDFs to the library:
Add from Menu: Click the + button on the menu sidebar, select the Add Download Link option in the popup options, and enter the URL of the PDF in the pop-up dialog.
Add from TermiPass Browser Extension: Open the TermiPass Browser Extension on the PDF page you want to bookmark. Navigate to Collect, then click on the Add button under the PDF Tab. This will add the current PDF to Wise's Inbox.
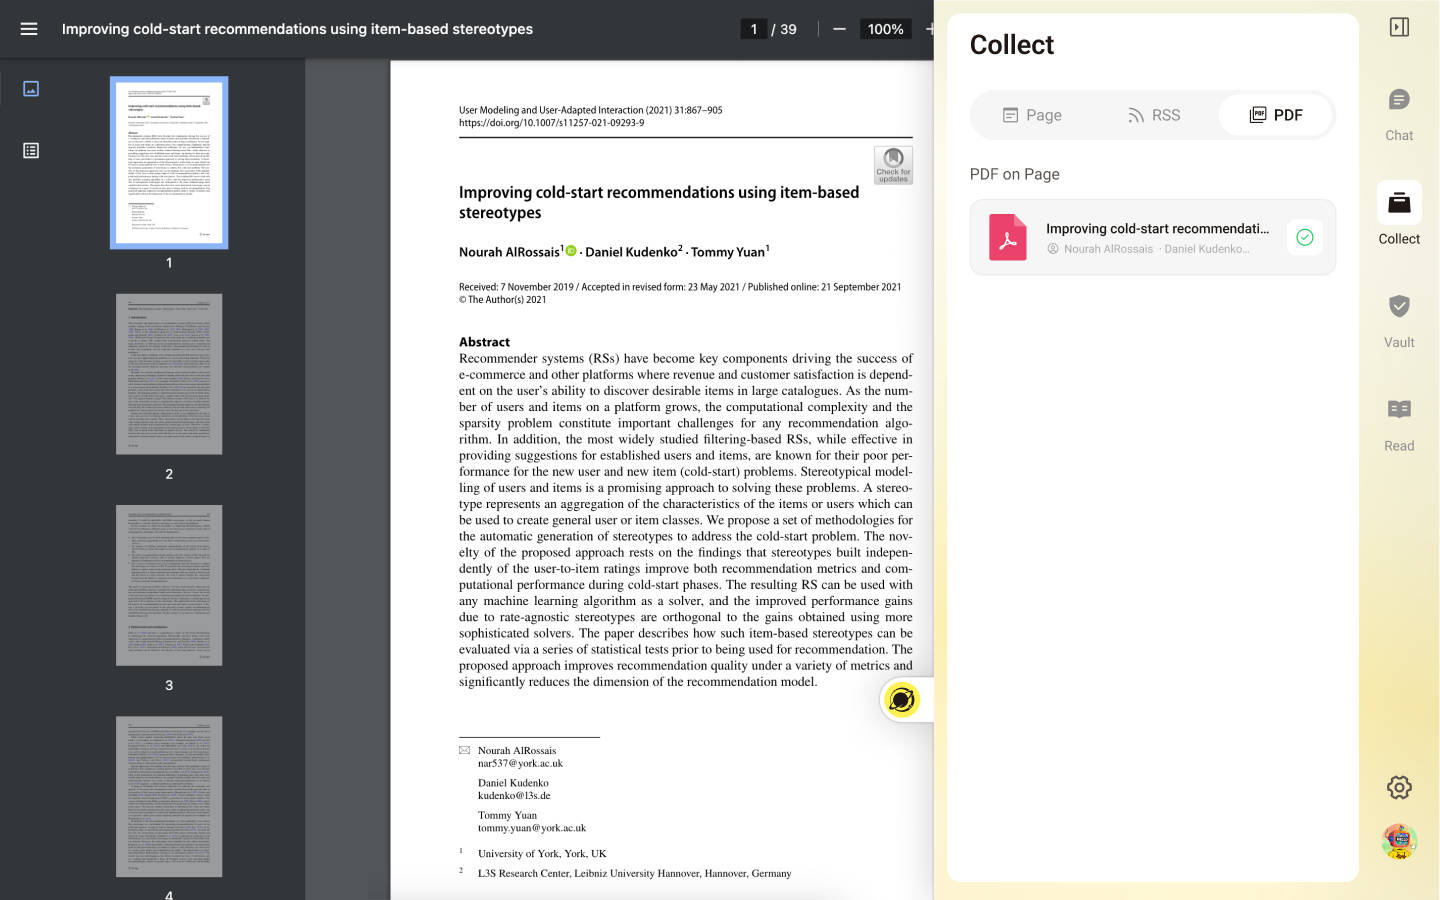
The PDFs you collect are listed under the PDFs page. Each row displays the title, summary, download status, author, addition time, and tags.
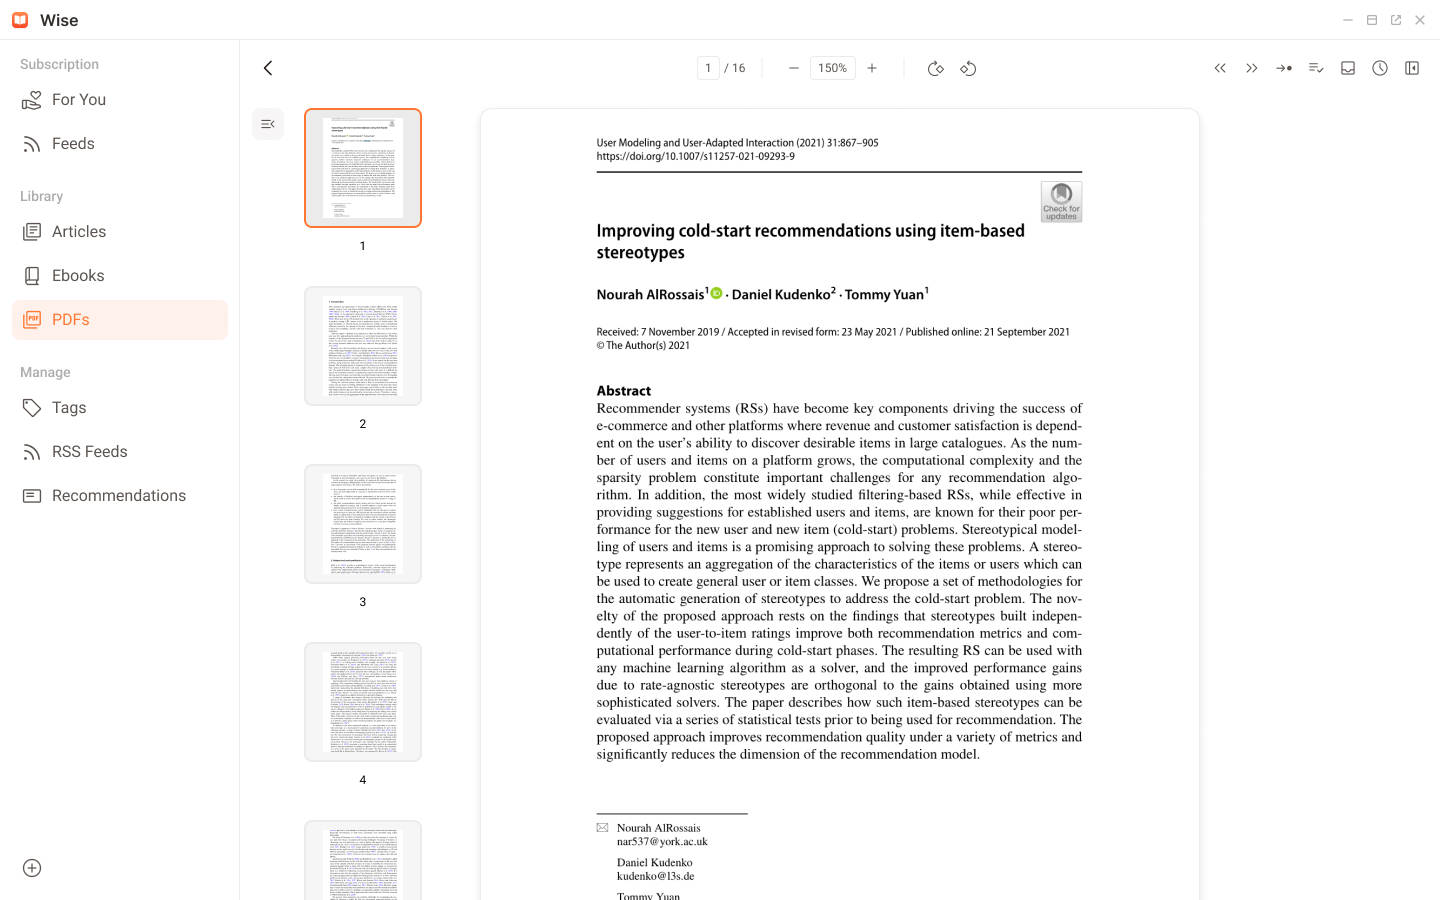
PDF Reader
The layout of Wise's PDF reading page is similar to that of the Article. The functions of each button on the PDF reading page are as follows:
- Page navigation: Enter the page number to jump directly to that page
- Page zoom: Click - and + to zoom the page, or enter a custom zoom ratio
- Rotate page: Rotate the current page clockwise or counterclockwise
- Previous: Takes you to the previous PDF in the result list
- Next: Takes you to the next PDF in the result list
- Next Unread: Takes you to the next unread PDF in the result list
- Mark as Read/Unread: Changes the read status of the PDF
- Inbox: Adds or moves the PDF to the Inbox
- Read Later: Adds or moves the PDF to Read Later
- Page Preview: Located on the left side of the reader, you can open or close the page preview by clicking the button above
Organize Your Ideas with Note and Tag
Wise provides Note and Tag functions to help you record insights while reading and keep your documents well-organized.
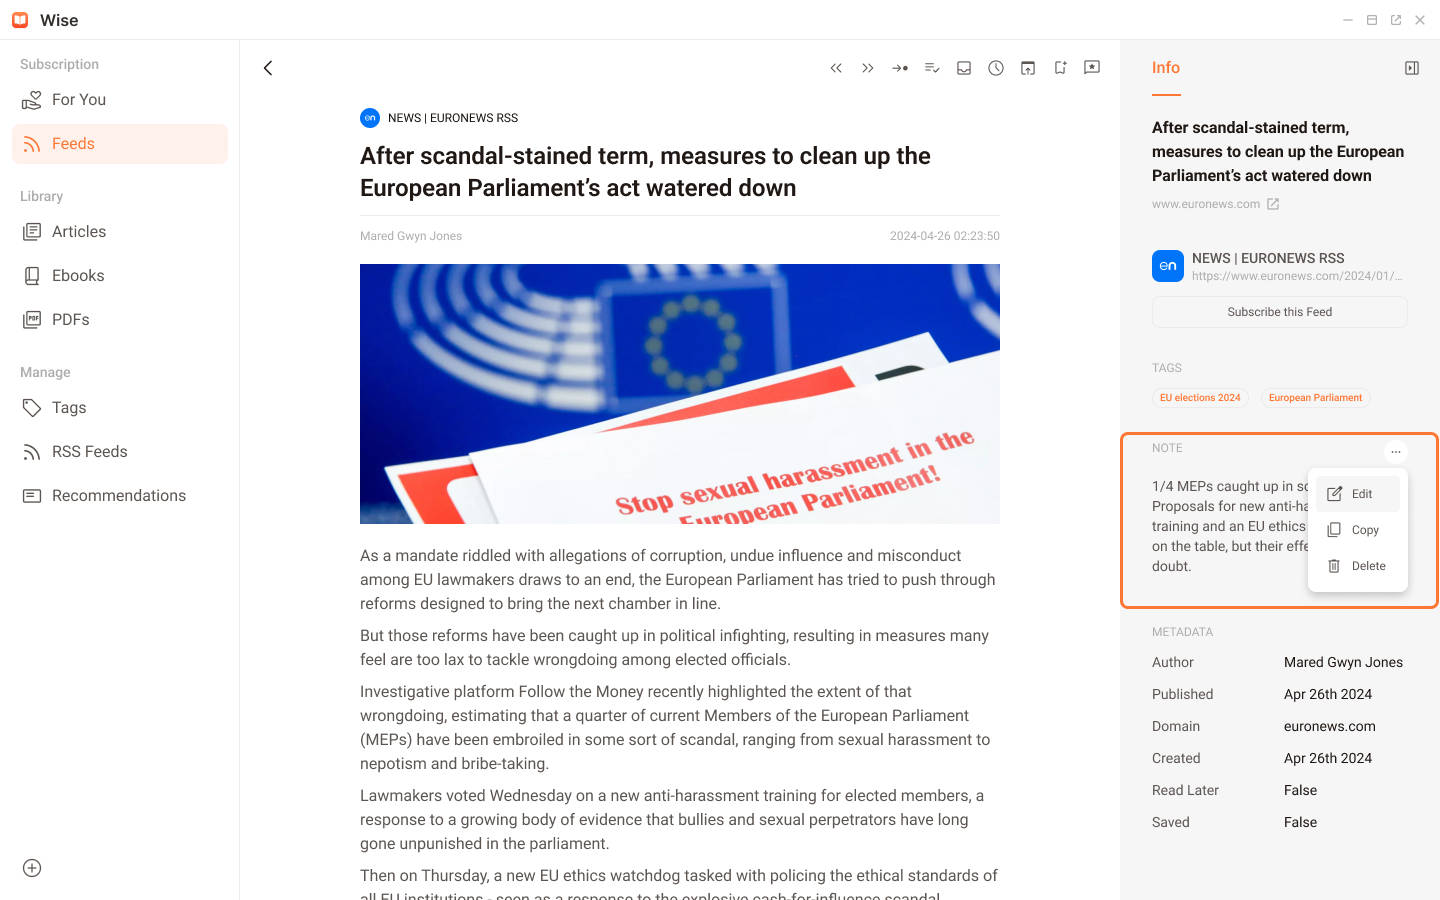
Note: Capturing Your Thoughts
Note provides a dedicated space to jot down your thoughts, observations, and key takeaways from an article.
Add a Note: In the Info column, click on the Note section to add a note to the current document.
Modify and Delete a Note: In the Info column, hover your mouse over the Note section and click the Edit button to modify the Note.
Tags: Categorizing Your Content
Tags provide a powerful way to categorize and organize your articles in Wise using relevant keywords or phrases.
Add a Tag: On the result list page, click the Tag button on the document card, then select or create a tag in the input box.
Delete a Tag: There are two ways to delete a tag from an article.
- Delete a specific Tag from a single document: On the result list page, click the Tag button on the document card, then click X in the input box to remove a tag.
- Delete a specific Tag from all documents: On the 'Tags' page, delete a Tag. This action will remove this Tag from all documents.
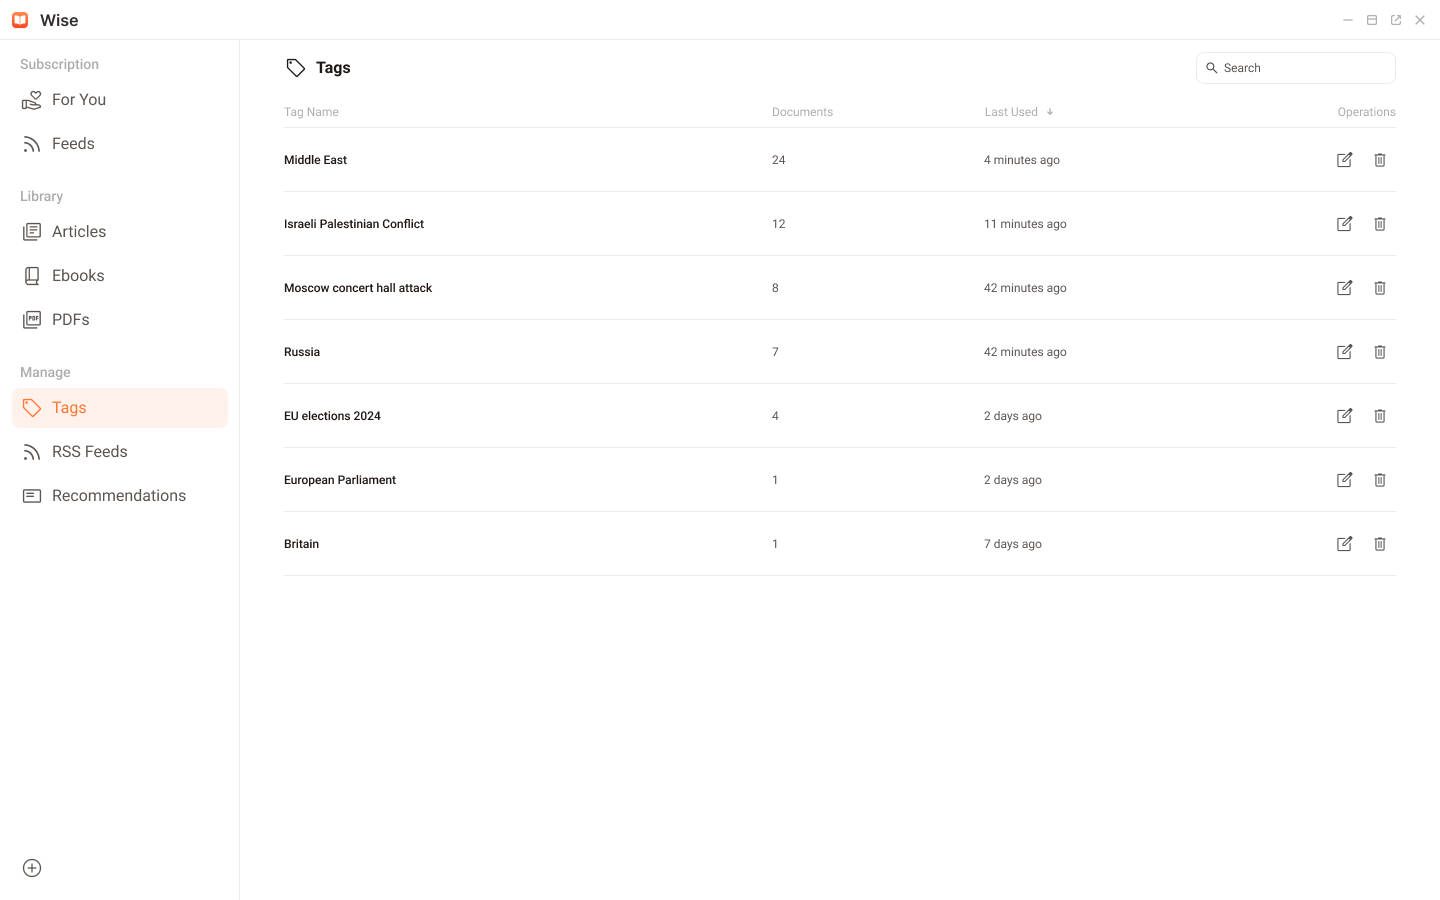
Manage Tags: The Tags page offers a central location for tag management:
- View Tags: See a list of all tags, the number of documents associated with each tag, and the last usage time.
- Edit Tags: Click the Edit button next to a tag to modify its name.
- Delete Tags: Remove tags from your system.
- Search Tags: Use the search bar to quickly find specific tags.