Install Terminus on Raspberry Pi
This guide covers the detailed steps to install Terminus on your Raspberry Pi.
Prerequisites
Before you begin, ensure your system meets these requirements:
- A Raspberry Pie system meeting the following requirements:
- Hardware: Raspberry Pi 4B or Raspberry Pi 5 with 8GB memory
- Operating System: Raspbian 12
- Storage: 64GB (SSD Recommended)
- Ethernet cable
- TermiPass mobile app installed on your smartphone
- Terminus Name created
INFO
Learn why you need a Terminus Name here.
Step 1: Install Terminus
Configure the Raspbian environment to enable necessary features:
bashecho "$(head -1 /boot/firmware/cmdline.txt) cgroup_enable=cpuset cgroup_enable=memory cgroup_memory=1" | sudo tee /boot/firmware/cmdline.txt echo "kernel=kernel8.img" | sudo tee -a /boot/firmware/config.txtBind your local IP to your Ubuntu hostname for stable DNS resolution:
bashsudo apt install net-tools ifconfig # Get your local IP. Make sure it starts with `192.168`.bashsudo nano /etc/hosts 192.168.xx.xx raspberrypi # Replace with your actual local IP and your host name.Reboot your Raspberry Pi to apply the changes.
bashsudo rebootInstall the latest build of Terminus:
bashcurl -fsSL https://terminus.sh | bash -INFO
If an error occurs during installation, use the following command to uninstall first:
bashbash uninstall_cmd.shAfter uninstalling, retry the installation by running the original installation command.
Step 2: Enter Terminus Name
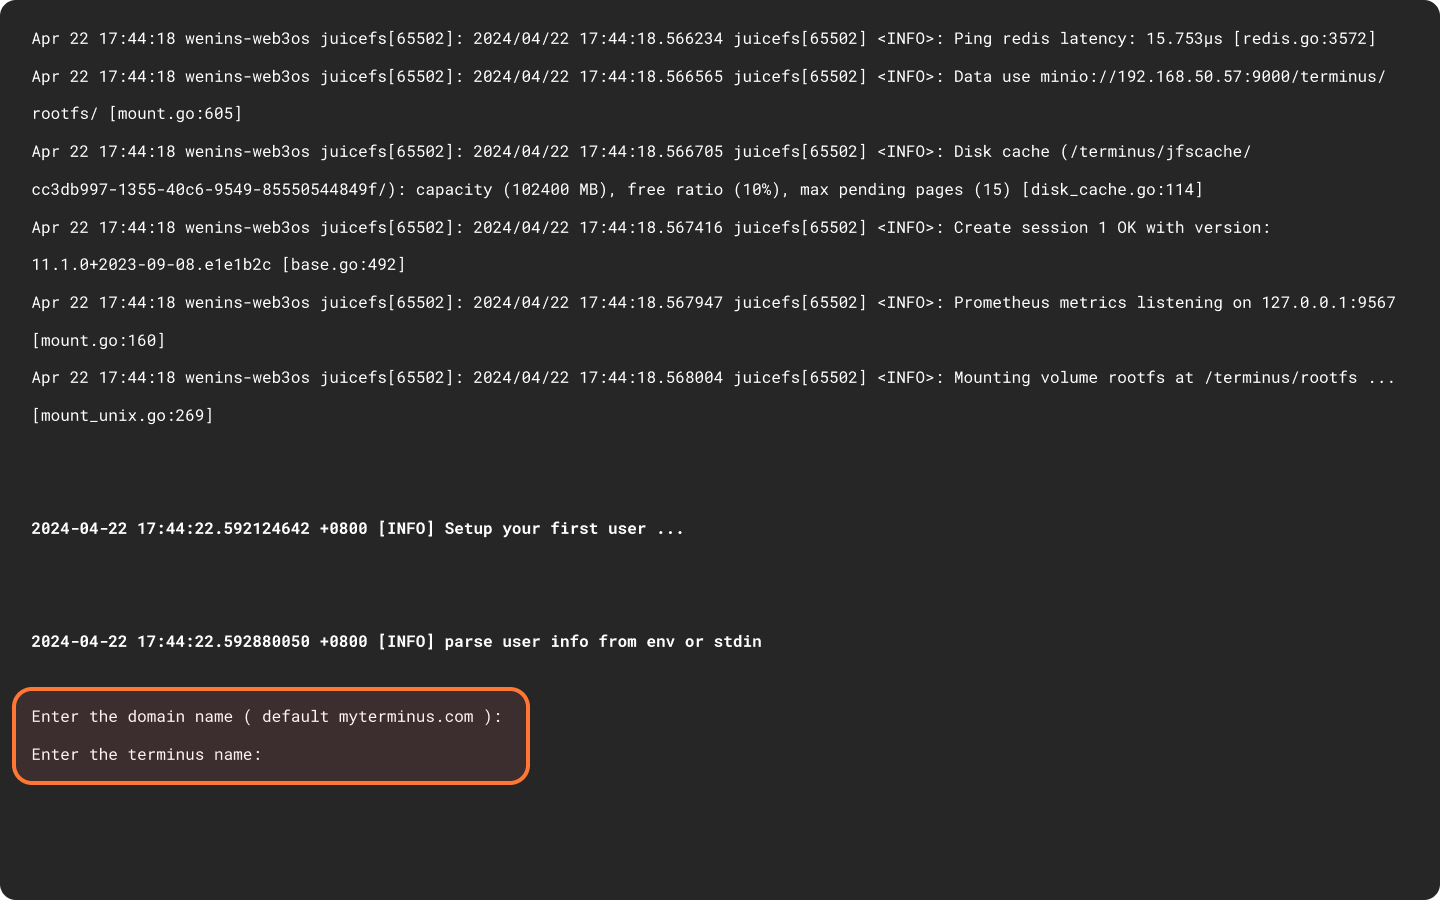
At the end of the installation process, enter your domain name and Terminus Name as prompted by the system:

If your Terminus Name is "alice@myterminus.com", press Enter or type
myterminus.comfor the domain name, then typealicefor the terminus name.If your Terminus Name is "alice@helloworld.com", type
helloworld.comfor the domain name, then typealicefor the terminus name.
INFO
To use a custom domain name, make sure the domain configuration has been completed as described in Create Domain.
Step 3: Get Initial System Info
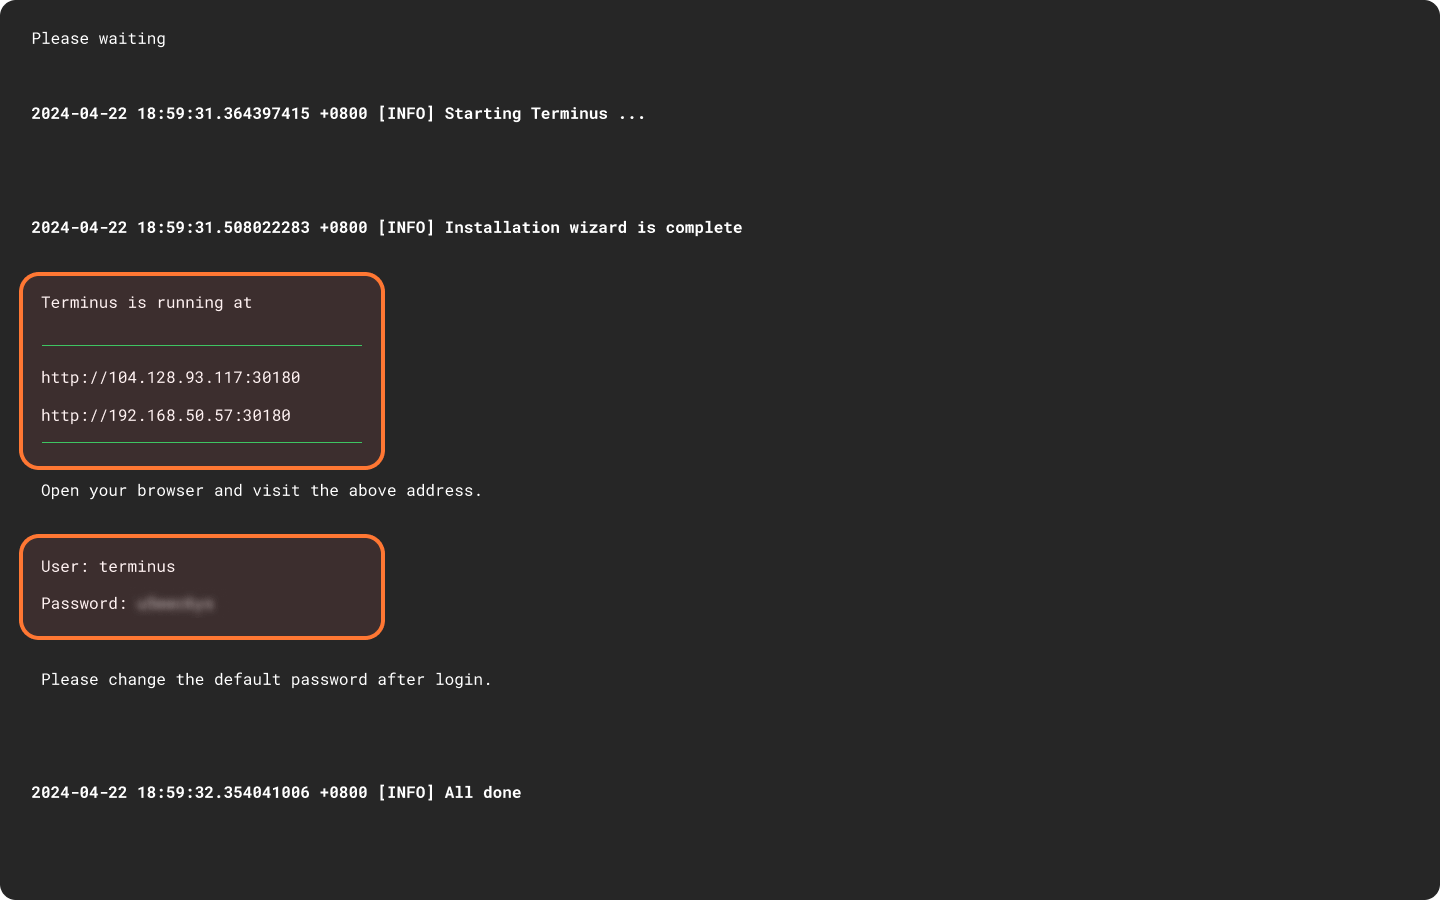
Upon completion of the installation, the initial system information, including the Wizard URL and the initial login password, will appear on the screen. You will need them later in the activation stage.

Wizard URL
There are two Wizard URLs as shown the screenshot:
- The upper one is for internal network access.
- The lower one is for public network access.
Generally speaking, if your computer and Terminus are on the same network, use the internal network URL. If not, use the public network URL.
TIP
When using the internal network URL, please note:
- You might need to set up a reverse proxy during activation.
- If you're activating TermiPass by QR scanning, ensure your phone and Terminus are on the same network.
Initial Login Password
Please take note of the initial one-time password in the lower red square. You will need it in the Wizard page.