Install Terminus on Mac
This guide covers the detailed steps to install Terminus on your Mac. This method uses containerized tools like Docker Desktop and Minikube to create a suitable environment for running Terminus OS on Mac.
NOTE
Currently, Terminus on Mac has certain limitations including:
- Lack of distributed storage support
- Inability to add local nodes.
We recommend using it only for development or testing purposes.
Prerequisites
- A Mac meeting the following requirements:
- Architecture: X86-64 or ARM64
- RAM: 8GB or above (available memory)
- Storage: 64GB or above (available disk space)
- MacOS: Monterey (12) or later
- Docker and MiniKube intalled on your Mac.
TIP
For MiniKube, it's recommended to install via homebrew.
- TermiPass mobile app installed on your smartphone.
- Terminus Name created.
INFO
Learn why you need a Terminus Name here.
Step 1: Install Terminus
Configure Docker. In Docker Desktop, navigate to Settings > Resources, and configure as below:
- CPU limit: Set to at least 4 CPUs
- Memory limit: Set to at least 9 GB
Click Apply & Restart to implement the changes.
In terminal, run the following command to install the latest build of Terminus:
bashcurl -fsSL https://terminus.sh | bash -This script sets up the necessary components for Terminus OS, including configuring MiniKube, setting up Kubernetes and networking, and installing required plugins. Depending on your network and system, the installation time may vary.
INFO
If an error occurs during installation, use the following command to uninstall first:
bashbash uninstall_macos.shAfter uninstalling, retry the installation by running the original installation command.
Step 2: Enter Terminus Name
At the end of the installation process, enter your domain name and Terminus Name as prompted by the system:
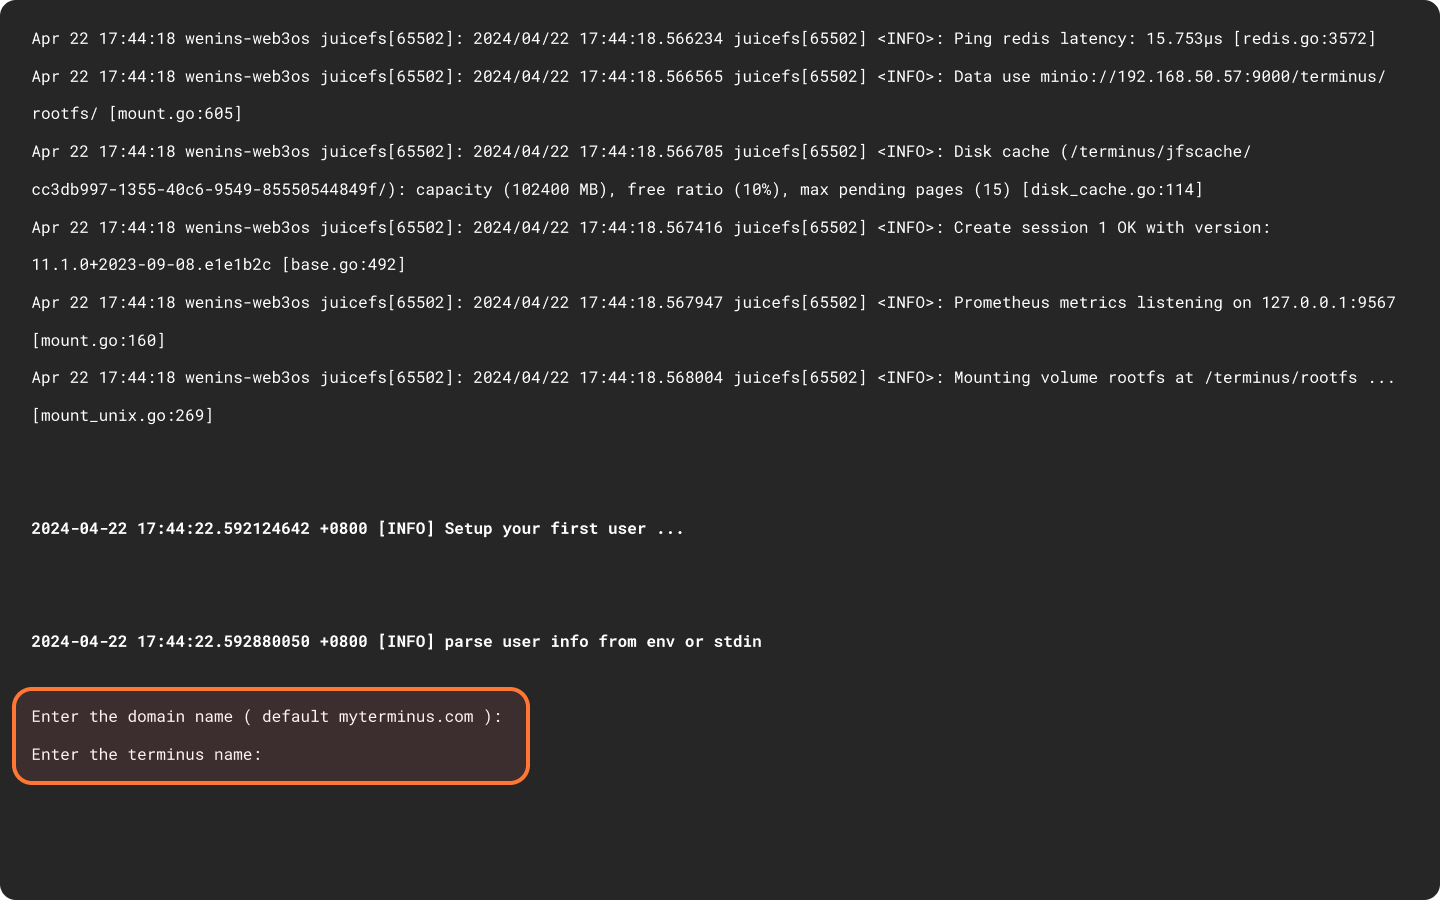
If your Terminus Name is "alice@myterminus.com", press Enter or type
myterminus.comfor the domain name, then typealicefor the terminus name.If your Terminus Name is "alice@helloworld.com", type
helloworld.comfor the domain name, then typealicefor the terminus name.
INFO
To use a custom domain name, make sure the domain configuration has been completed as described in Create Domain.
Step 3: Get Initial System Info
Upon completion of the installation, the initial system information, including the Wizard URL and the initial login password, will appear on the screen. You will need them later in the activation stage.
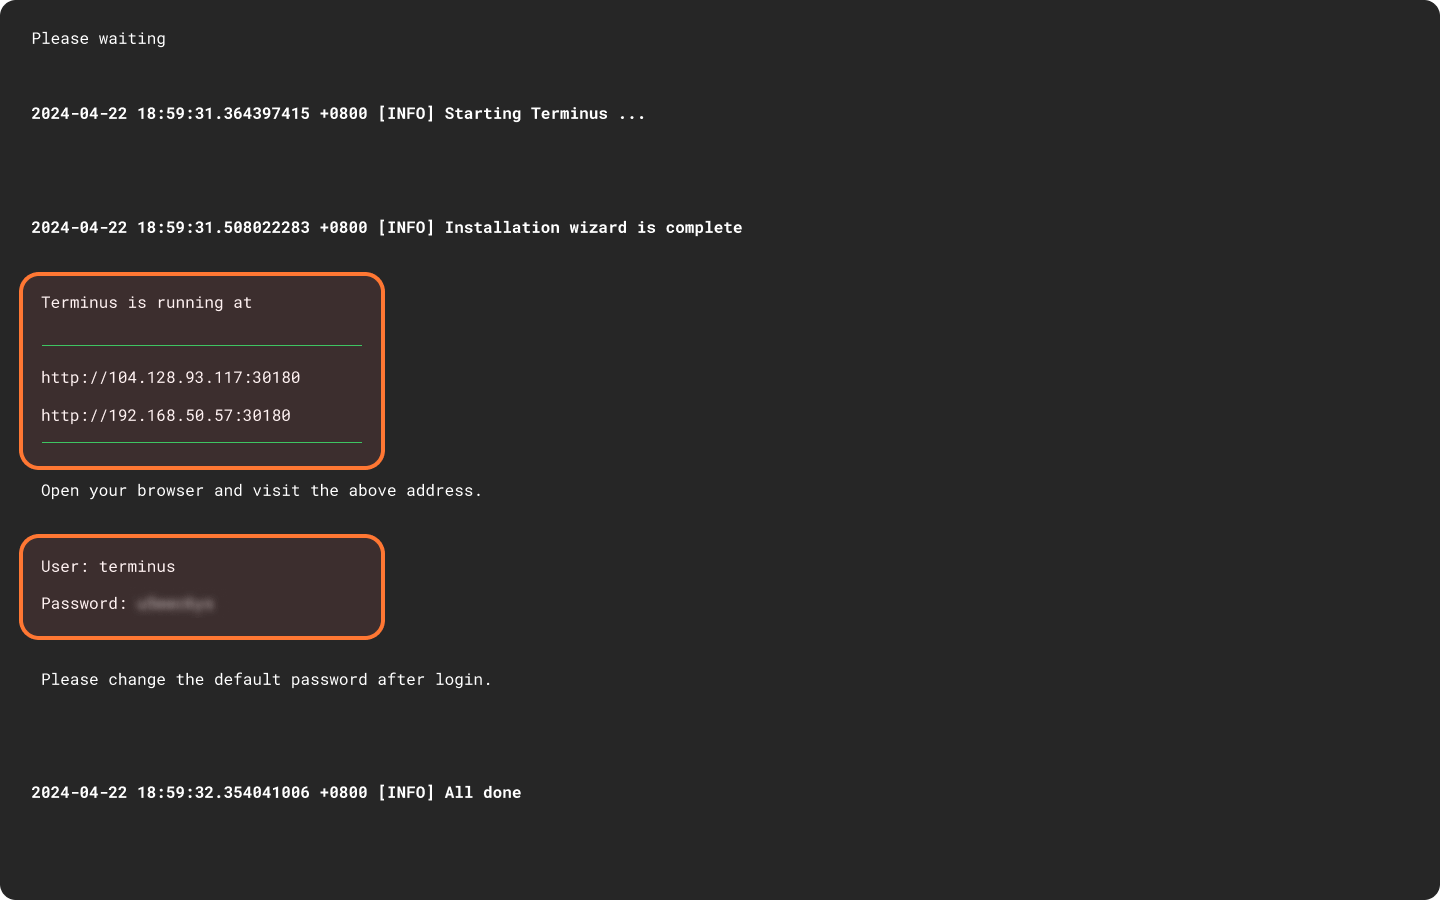
Wizard URL
There are two Wizard URLs as shown the screenshot:
- The upper one is for internal network access.
- The lower one is for public network access.
Generally speaking, if your computer and Terminus are on the same network, use the internal network URL. If not, use the public network URL.
TIP
When using the internal network URL, please note:
- You might need to set up a reverse proxy during activation.
- If you're activating TermiPass by QR scanning, ensure your phone and Terminus are on the same network.
Initial Login Password
Please take note of the initial one-time password in the lower red square. You will need it in the Wizard page.