Install Terminus on Windows
This guide covers the detailed steps of installing Terminus on your Windows system. This method leverages the Windows Subsystem for Linux (WSL) to create a Linux environment within Windows, where Terminus OS is then installed.
NOTE
Currently, Terminus on Windows has certain limitations including:
- Lack of distributed storage support
- Inability to add local nodes
We recommend using it only for development or testing purposes.
Prerequisites
Before you begin, ensure your system meets these requirements:
- A Windows machine meeting the following requirements:
- CPU: 4 cores or above
- RAM: 16 or above (available memory)
- Storage: 64GB or above (available disk space)
- Supported Systems:
- Windows 10 or 11
- Linux (on WSL2): Ubuntu 20.04 LTS or later; Debian 11 or later
- TermiPass mobile app installed on your smartphone
- Terminus Name created
INFO
Learn why you need a Terminus Name here.
Step 1: Install Terminus
Create a
.wslconfigfile in your Windows user directory (typicallyC:\Users\YourUsername\) with the following content:bash[wsl2] memory=16GB swap=0GBOpen PowerShell as Administrator and run the following commands to install Ubuntu in your WSL environment:
PowerShellwsl --install -d Ubuntu-22.04 wsl --updateINFO
You may need to restart your system after Ubuntu is installed if it's the first time installing WSL.
In PowerShell, run the following command to obtain Windows host IP:
PowerShellnetsh interface ipv4 show addressesNote the IP Address of your WLAN or Ethernet interface. It should start with
192.xxx. You will need it when installing Terminus.Set up port forwarding for your WSL server.
a. Get the IP address of the WSL server.
PowerShellwsl ip address show eth0 `| grep inet `| grep -v inet6 `| cut -d ' ' -f 6 `| cut -d '/' -f 1 # This typically returns an IP address in format of "172.xx.xx.xx"b. Set up port forwarding rules:
PowerShellnetsh interface portproxy add v4tov4 listenport=80 listenaddress=0.0.0.0 connectport=80 connectaddress=<addr for hostname> netsh interface portproxy add v4tov4 listenport=443 listenaddress=0.0.0.0 connectport=443 connectaddress=<addr for hostname> netsh interface portproxy add v4tov4 listenport=30180 listenaddress=0.0.0.0 connectport=30180 connectaddress=<addr for hostname> # Replace <addr for hostname> with the IP address you get from step a.Configure the Ubuntu environment.
a. Open the Start menu and search for
Ubuntu-22.04, and click on the Ubuntu icon to launch your Linux environment.PowerShellwsl -d Ubuntu-22.04b. In Ubuntu, modify the
/etc/wsl.conffile as specified below.NOTE
Make sure you open the file with sudo privileges.
bash[boot] systemd=true command="mount --make-rshared /" # Add this line [network] generateHosts = false generateResolvConf = false # Allow manually managing hosts file and DNS settings hostname=terminus # Set the hostname for the WSL instancec. Shut down Ubuntu in PowerShell and restart it.
PowerShellwsl --shutdown Ubuntu-22.04d. In Ubuntu, modify the hosts file and the
resolv.conffile:bashsudo sh -c "echo \"127.0.0.1 localhost\n \ $(ip -4 addr show eth0 | grep -oP '(?<=inet\s)\d+(\.\d+){3}') $(hostname)\" > /etc/hosts && \ echo \"nameserver 1.1.1.1\nnameserver 1.0.0.1\" > /etc/resolv.conf"This command binds Ubuntu's local IP with the host name, and configures DNS resolution to use Cloudflare's public DNS servers.
Install Terminus.
a. In Ubuntu, run the following command to install the latest build of Terminus:
bashcurl -fsSL https://terminus.sh | bash -b. During installation, enter the Windows host IP (
192.168.xxx.xxx) you obtained earlier in step 3 when prompted. Then, press Enter to proceed.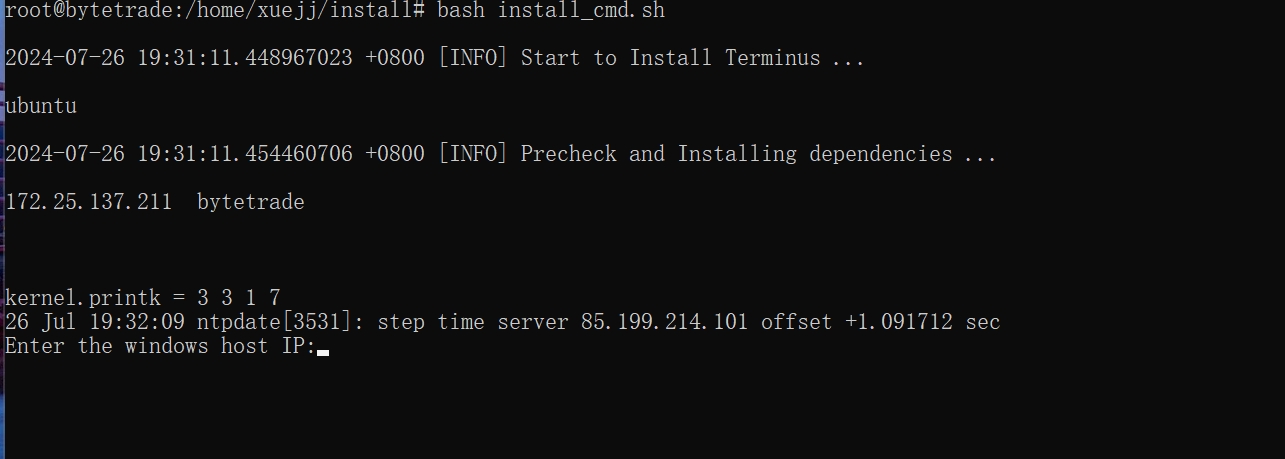
INFO
If an error occurs during installation, use the following command to uninstall first:
bashbash uninstall_cmd.shAfter uninstalling, retry the installation by running the original installation command.
Step 2: Enter Terminus Name
At the end of the installation process, enter your domain name and Terminus Name as prompted by the system:
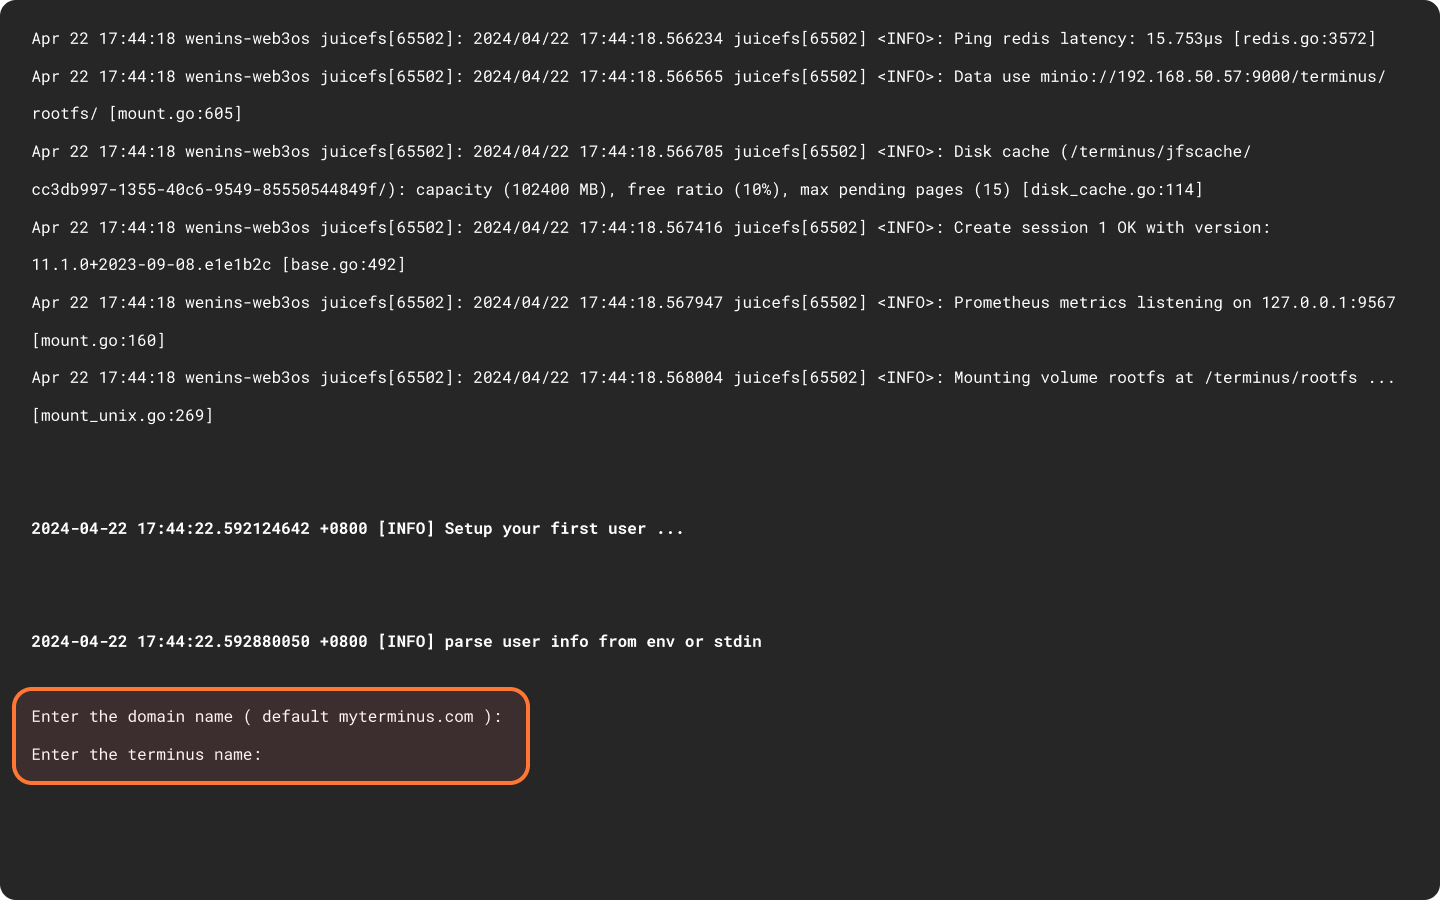
If your Terminus Name is "alice@myterminus.com", press Enter or type
myterminus.comfor the domain name, then typealicefor the terminus name.If your Terminus Name is "alice@helloworld.com", type
helloworld.comfor the domain name, then typealicefor the terminus name.
INFO
To use a custom domain name, make sure the domain configuration has been completed as described in Create Domain.
Step 3: Get Initial System Info
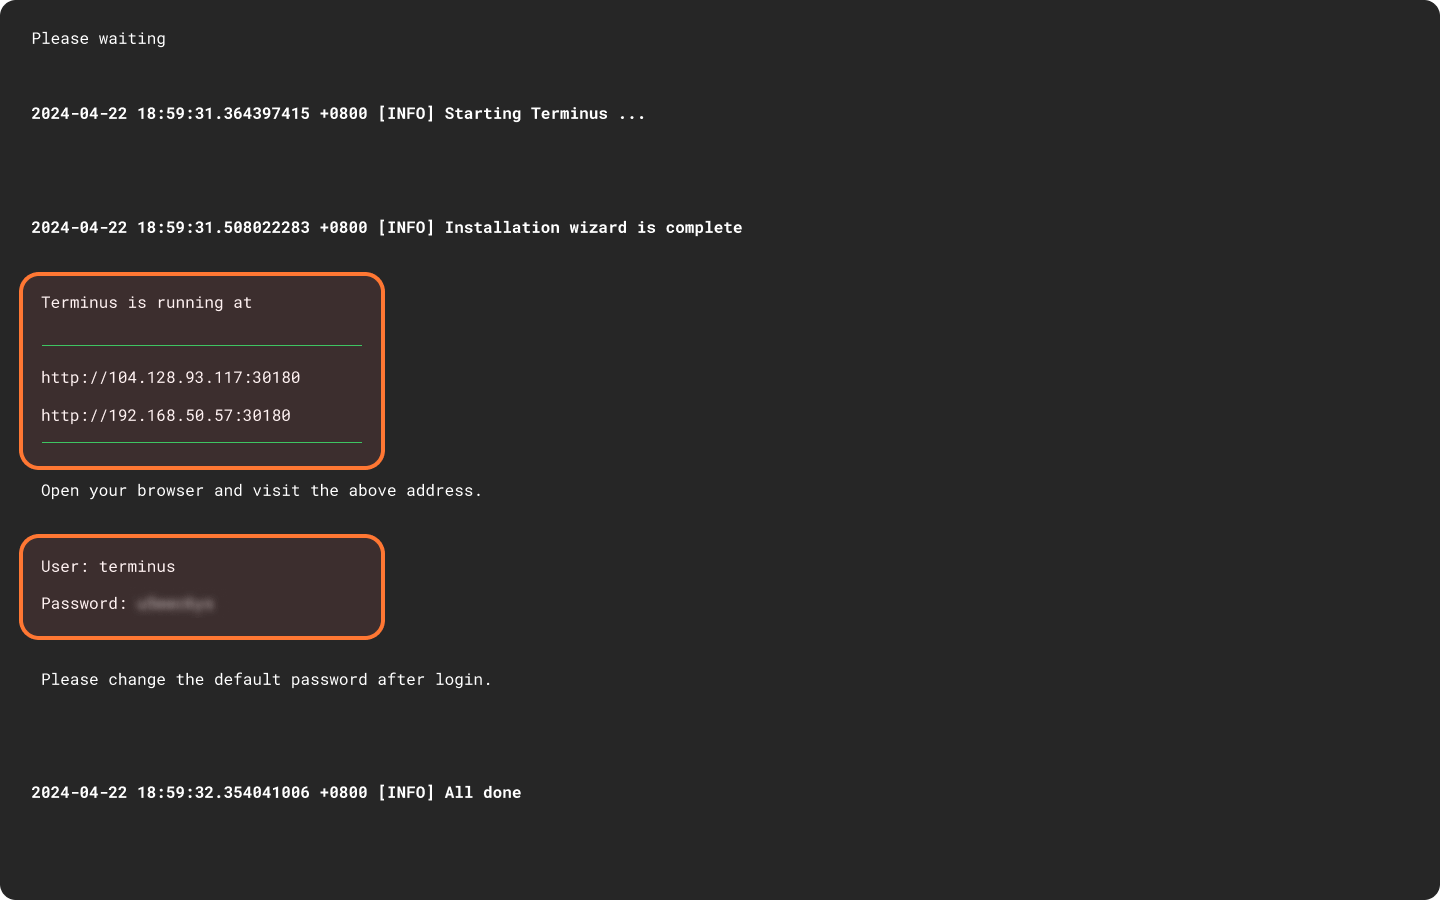
Upon completion of the installation, the initial system information, including the Wizard URL and the initial login password, will appear on the screen. You will need them later in the activation stage.
Wizard URL
There are two Wizard URLs as shown the screenshot:
- The upper one is for internal network access.
- The lower one is for public network access.
Generally speaking, if your computer and Terminus are on the same network, use the internal network URL. If not, use the public network URL.
TIP
When using the internal network URL, please note:
- You might need to set up a reverse proxy during activation.
- If you're activating TermiPass by QR scanning, ensure your phone and Terminus are on the same network.
Initial Login Password
Please take note of the initial one-time password in the lower red square. You will need it in the Wizard page.