Otmoic
This chapter will introduce how to use the Otomic System from both the LP perspective and the User perspective.
For LP
For LPs, you need to set three parts: Bridge, AMM(Automated Market Maker), and Monitor. The Bridge is a fundamental part of the system and needs to be set up first for the system to work. AMM controls your hedging strategy. The Monitor tracks all data, allowing you to set alerts based on your own strategies.
We provide preset configuration schemes for direct use, but we recommend customizing these configurations to suit your needs and achieve better execution results.
Configure a Bridge
This section will guide you through the process of configuring a bridge in the Otmoic system. The bridge in the Otmoic system is similar to the trading pair in an exhange, but a bridge is unidirectional. This means you can only exchange an asset for another, but not vice versa.
You can configure a bridge in two places:
- For the initial configuration, you can input all the necessary information on the 'Guide' page.
- For any additional bridges, you should go to each project's configuration page.
First Bridge
Configure Token
You need to provide or select two parts of information to configure a
token.- The blockchain where the
tokenis located. - Information about the
tokenitself, including Contract Address, Name displayed in the system, Market Name, Token Precision, Token Type.- The Market Name is used for hedging and retrieving market prices. It automatically matches trading pairs with
MarketName/USDTin centralized exchanges. - The token type includes
coinandstable coin. The type of token influences the hedging logic of the Automated Market Maker. Non-stable coins are traded in the Inverse Perpetual Contract in exchanges to maintain a stable overall net value. Please choose according to your circumstances.
- The Market Name is used for hedging and retrieving market prices. It automatically matches trading pairs with
We have preset several token configurations to simplify your setup process. The configuration uses test tokens on the test blockchain and common tokens on the actual blockchain.
In the video, you may have noticed that we set up two tokens. This is because a
bridgeneeds at least two tokens, one at each end, to function correctly. For instance, if we want to establish abridgeto exchangeUSDTonETHforUSDTonBSC, we must set up theUSDTtoken information on bothETHandBSC.- The blockchain where the
Configure Wallet
You need to provide or select two parts of information to configure a
wallet.- The blockchain used by the
wallet. - Information about the
walletitself, including Address, Private Key.
When executing an exchange, you (as LP) receive tokens in the
srcside and need to send tokens in thedstside. So you need at least onewalleton the same blockchain as the token in dst to complete the transaction. You also need to make sure that yourwallethas enoughgasanddsttokens to finish the exchange.If the tokens you're receiving (
src) and sending (dst) aren't on the same blockchain, or if you want to use a differentwalletto receive tokens, you'll need to set up anotherwalletforsrc.TIP
The wallet used on the
dstside needs to declare its ownership status on the blockchain. Please refer to the guide for setting an NFT avatar.- The blockchain used by the
Configure Account
You only need to provide the introduction of LP to configure an
account. Your Terminus Name will be used as your lp_id, and all identity verification during the exchange process will also be based on your Terminus Name.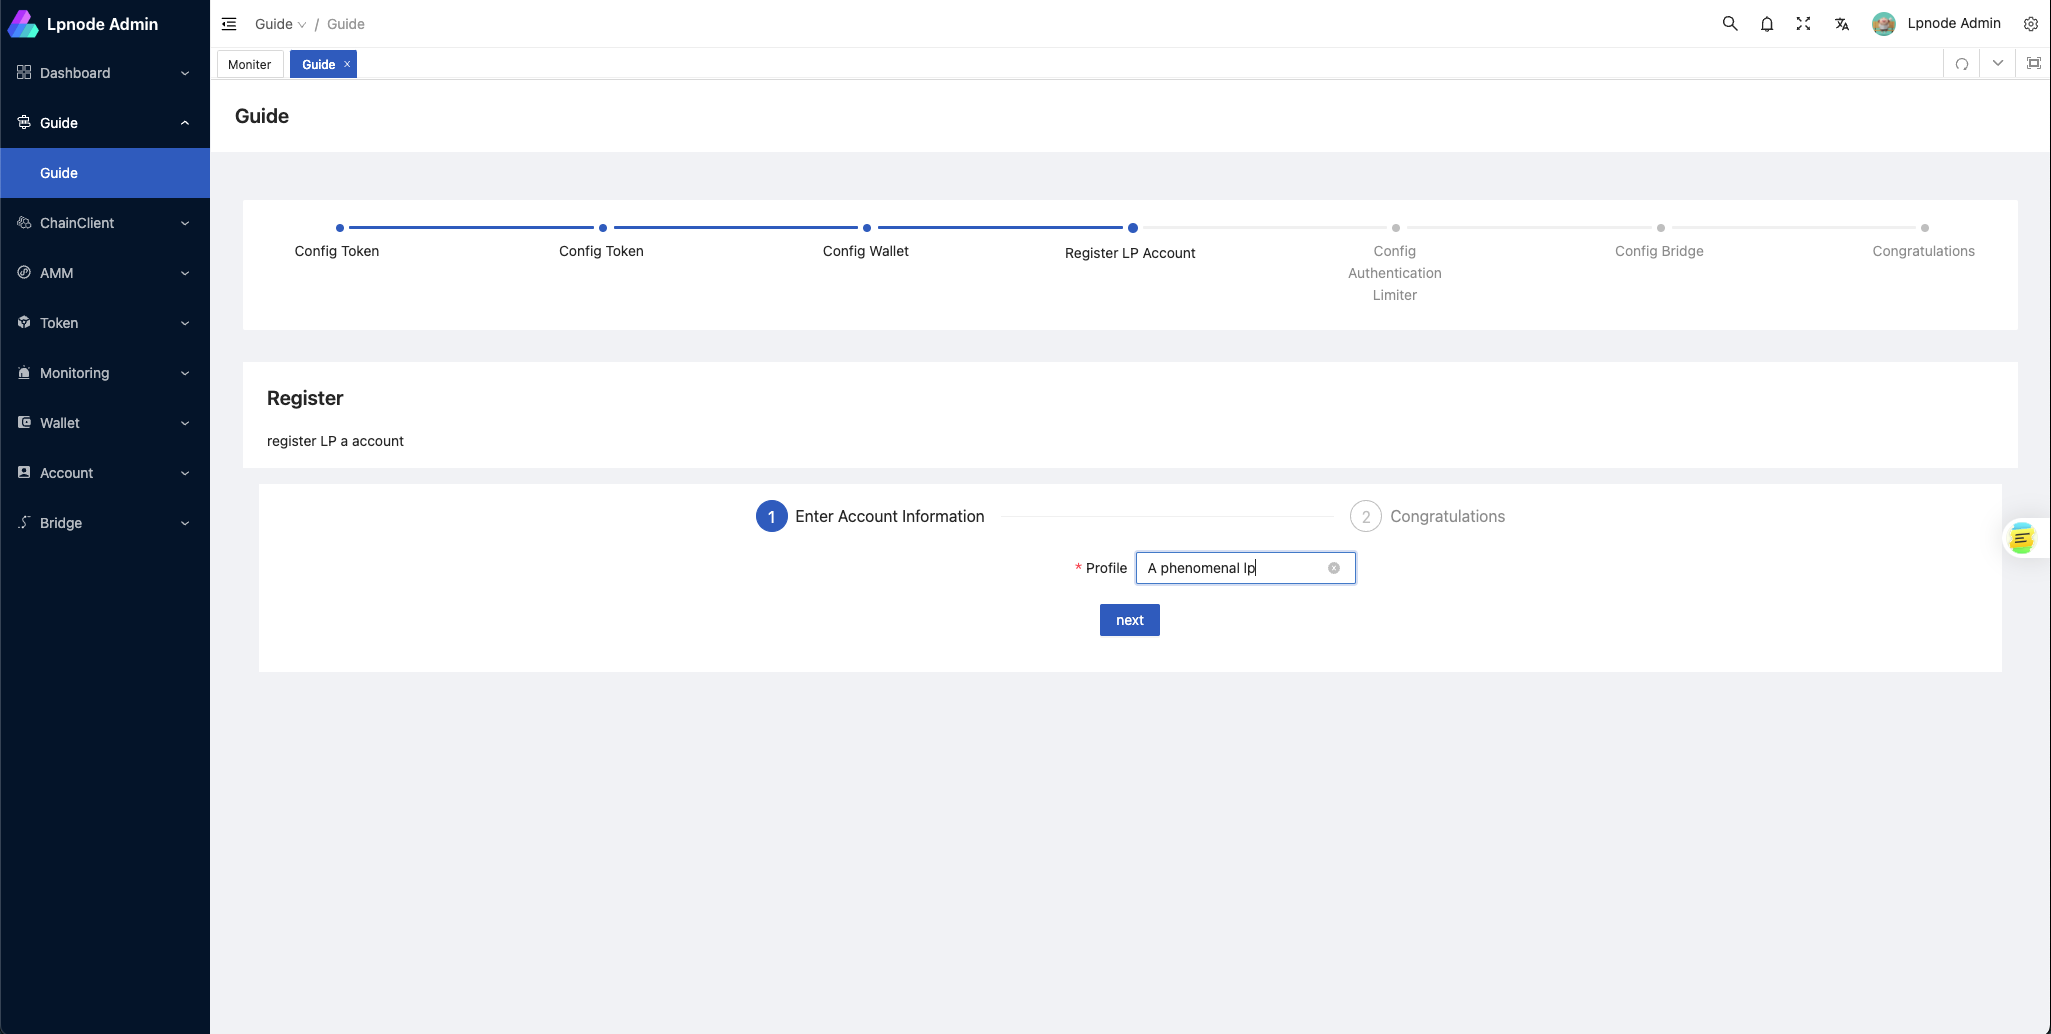
Configure Limiter
To configure the limiter, select either
blacklistorwhitelistmode. Then, choose countries from the corresponding list.Configure bridge
Select SRC Token, DST Token, SRC Wallet, DST Wallet, and the AMM program that you previously configured to create a
bridge.- SRC Token: The token received
- DST Token: The token to be sent
- SRC Wallet: The wallet that receives the src token
- DST Wallet: The wallet that sends the dst token
- Open AuthenticationLimiter: Enable limiter for this bridge (restrictions based on KYC geographic information are currently supported)
More Bridges
If you want to set up more bridges, you can fill in the details for each part of the new bridges from the sidebar. Then, go to the bridge setup page to create more.
Configure AMM
To configure the AMM(Automated Market Maker), enter the 'Amm' - 'Programs' page, then click on AMM Program. A configuration editor will appear on the right side. You can modify the configuration file to control the logic of the AMM program. 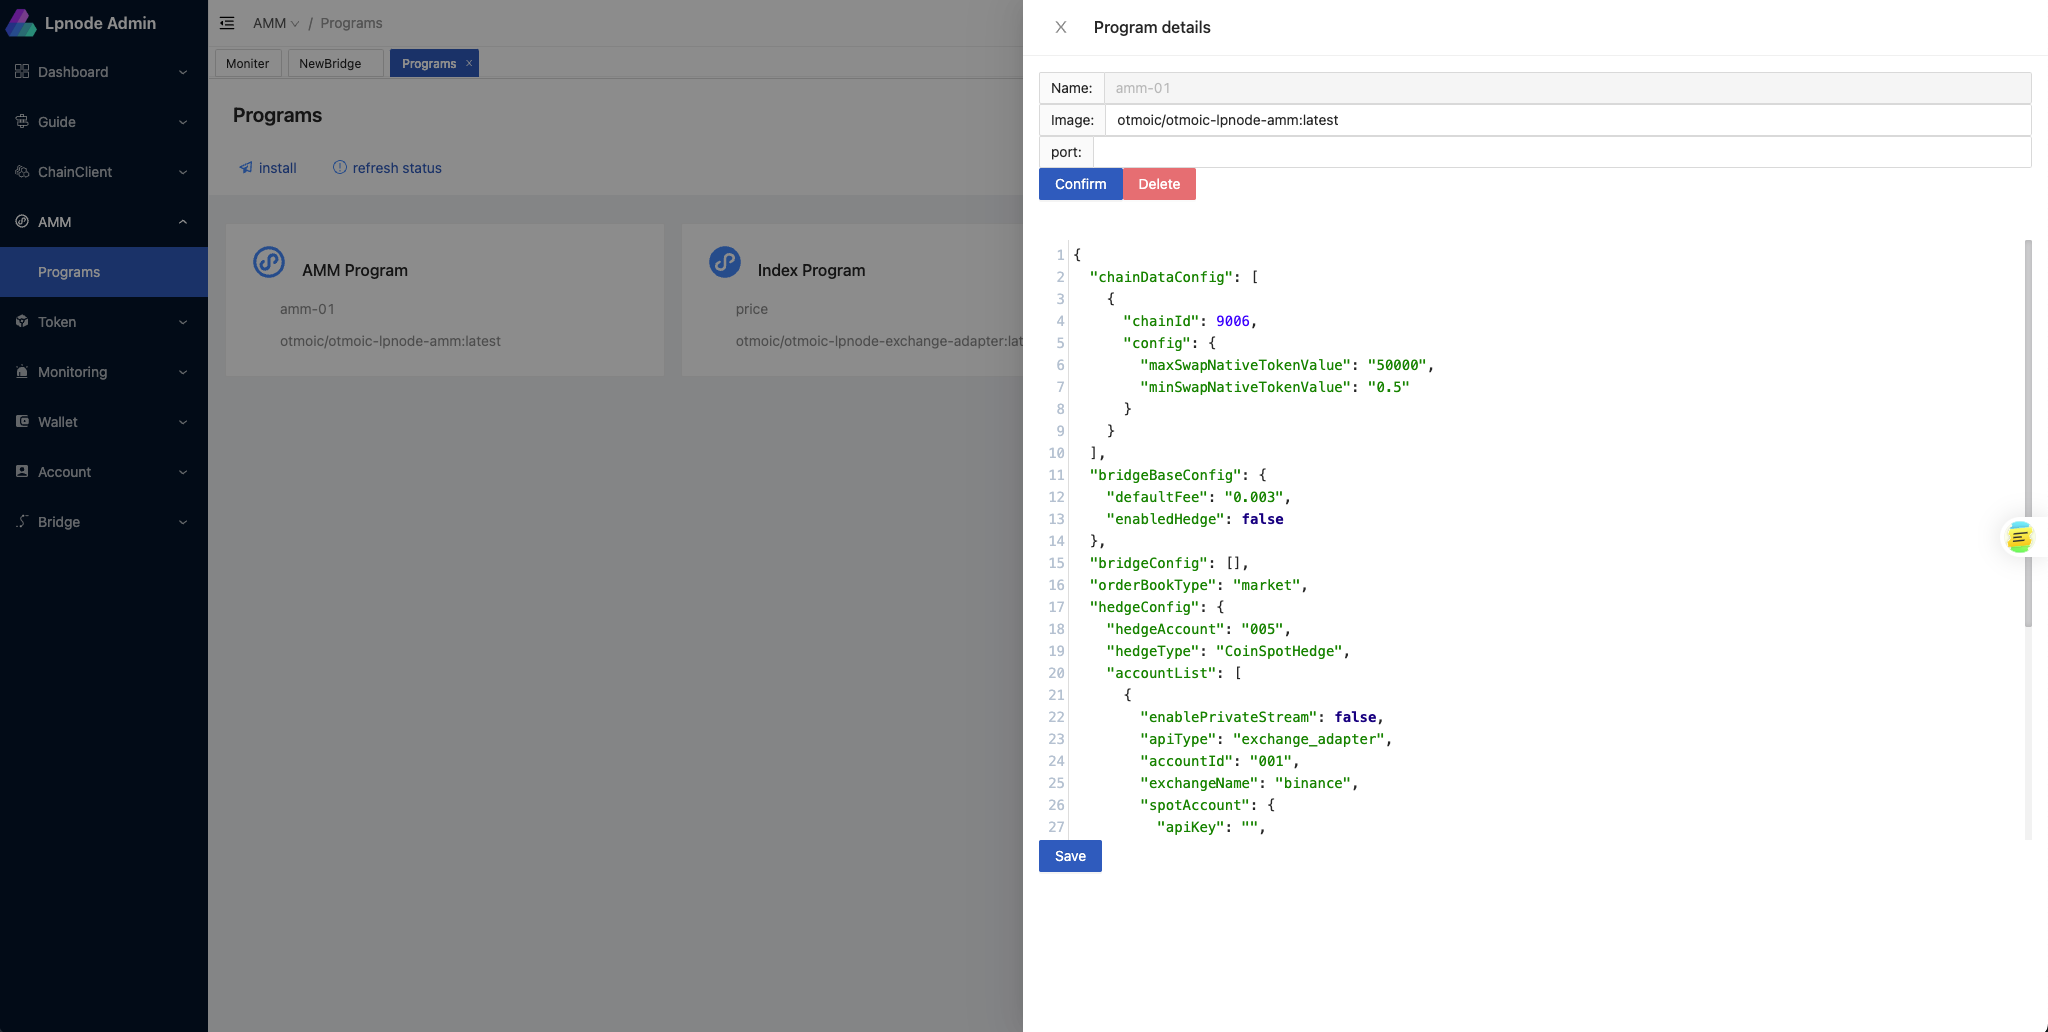
Both AMM and exchange_adapter uses this configuration file to ensure consistency in account and exchange information during loading.
{
  // Configure parameters for multiple blockchains, each blockchain has a unique chainId
  "chainDataConfig": [
    {
      "chainId": 9006, // Blockchain ID

      "config": {
        "maxSwapNativeTokenValue": "50000", // Maximum exchange native token value. The maximum value in the quote is the minimum of the following: 1. The balance of the target chain's native tokens 2. The maximum executable amount in hedging strategy  3. The balance of the CEX during hedge operation 4. The configured value here.
        "minSwapNativeTokenValue": "0.5" // An outdated value, currently not in use
      }
    }
  ],
  // Basic configuration of bridge
  "bridgeBaseConfig": {
    "defaultFee": "0.003", // How much cross-chain fee is charged
    "enabledHedge": false //  Whether to enable hedge
  },
  // This configures specific cross-chain bridges (e.g., ETH-USDT). It has higher priority than bridgeBaseConfig, and it will override the configuration of the corresponding pair. If you want to use the hedging function for some certain token exclusively, or set a separate fee, you can use this option.
  "bridgeConfig": [
    {
      "defaultFee": "0.003",
      "enabledHedge": false
    }
  ],
  // Order book type, here is market order book
  "orderBookType": "market", // When the value is market, the orderbook is initialized as the Cex type and is obtained from the exchange_adapter. Currently, only `market` is supported. If you want to use other orderbooks, please configure a values and write the corresponding implementers.

  // Hedge configuration
  "hedgeConfig": {
    "hedgeAccount": "001", //hedge account ID. When you set 'enabledHedge' to true, the system pulls up account information that matches the 'accountList' set below, using this value. currently, the AMM app only supports accounts related to spot. "hedgeType": "CoinSpotHedge", // Hedge type

    "accountList": [
      // Account list
      {
        "enablePrivateStream": false, // Whether to enable the private stream
        "apiType": "exchange_adapter", // API type: exchange adapter, exchange|profolio|exchange_adapter corresponds to local exchange implementation|use profolio|use exchange_adapter, it is used to configure how the system initializes the exchange, load the transaction information, sync account information, and operate orders
        "accountId": "001", // Account ID, when id == hedgeConfig.hedgeAccount is configured, this account will be enabled.
        "exchangeName": "binance", // The name of the exchange corresponds to the account. This takes effect when the API type is either `portfolio` or `exchange_adapter`.
        "spotAccount": {
          // Spot account information
          "apiKey": "", // API key
          "apiSecret": "" // API secret
        },
        "usdtFutureAccount": {
          // USDT denominated futures account information
          "apiKey": "", // API key
          "apiSecret": "" // API secret
        },
        "coinFutureAccount": {
          // Coin denominated futures account information
          "apiKey": "", // API key
          "apiSecret": "" // API secret
        }
      }
    ]
  }
}
:::
Configure Monitor
You can setup custom monitoring scripts in the 'Monitoring' - 'Create' page. You can use ts to write your own monitoring strategy.
Coding
Copy your monitoring code to the 'Input Script' page. The built-in SDK in the environment allows you to access the system database and monitor the data that interests you. The demo video only illustrates how to fetch all transaction history, but you can explore more features and usage by yourself. For more detailed information, please refer to our code repository.Debugging
Click the 'Debug' button to view the script's execution results. If the program encounters any exceptions, you'll find error messages on this page. This feature is useful for simple debugging.
For User
For users, there are two core functions, Swap and KYC. The status of KYC may affect the quotation price offered by LP, and whether it accepts the exchange.
KYC
Here are the steps for the KYC process:
- Install the TermiPass browser extension and create or import your mnemonic.
- The web page obtains your
DIDthrough the TermiPass. - Upload your ID information.
- Fill out the KYC form correctly
- Use TermiPass to sign your KYC information and submit it to the relay server.
- Contact the reviewer to examine your KYC application. You may have to wait for some time.
- Once your application is approved, you can obtain your
VC certificatethrough the webpage. Save this in TermiPass, then use TermiPass to sign and submit yourVP certificate.
Swap
Here are the steps for the Swap process:
Quote stage
- Select 2 chains where the tokens you want to swap is located.
- Select the tokens you want to swap.
- Enter your receiving address.
- Choose a suitable quotation from the list.
- A grey quotation means it doesn't meet LP requirements and cannot be selected. It may be the KYC status, or your age or country.
- The star next to the LP name represents their credit. This score is based on their recent transaction history, average transaction time, and number of complaints, etc.
- Confirm the transaction information and sign it with your wallet (e.g. MetaMask).
Trade stage
If the type or amount of tokens locked by the LP differs from the quoted information, or if the LP doesn't lock the token within the given time, you can click 'complain' to file a complaint. Regardless of why a transaction didn't succeed, you can ask for a refund after the refund countdown ends.